The Horadric Cube Diablo 4 exploit in Season 13 has just been documented by Goblin-Inc. The technique completely changes the crafting approach: it is possible to build an item with four precise stats, guaranteed every time. No uncontrollable RNG, no hundreds of rerolls to hope for. A reproducible sequence of steps that delivers a targeted result, regardless of the starting item.
The entire Horadric Cube Diablo 4 sequence relies on locking a Greater Affix via the Enchantress, combined with the new Season 13 crafting tools: chaotic reroll, Aggressive Tuning Prism and Adept Tuning Prism, focused reroll. Each tool has a precise role in the sequence, and it is their combination in the right order that makes the perfect item achievable. If you are looking to maximize your character right now, also check out our Season 13 tier list to see which builds benefit most from this type of item.
Here is the full sequence, step by step, as Goblin-Inc presents it in the video.
Horadric Cube Diablo 4: locking a Greater Affix at the heart of the exploit
This is perhaps the most powerful mechanic discovered in Diablo 4 in a long time. The Horadric Cube Diablo 4 in Season 13 allows you to create deterministic perfect items: an item with a precise Greater Affix and three other optimal stats, guaranteed every time. No uncontrollable RNG. Just a targeted, reproducible result.

The principle relies on enchanting the Greater Affix. Take a concrete example: an item with 18% Vulnerable Damage as a Greater Affix. You enchant this affix via the Enchantress, without replacing it. This simple action is enough. The Greater Affix becomes "enchanted" in the game's eyes, and the Horadric Cube can no longer modify it. The line is permanently locked. You can then reroll the three other stats as many times as needed to bring them to their ideal values.
Theoretically, the best possible scenario is to start with two Greater Affixes: a Greater Affix Maximum Life and a Greater Affix on the stat you want. The other two lines remain free to reroll via the Cube. For the majority of players, a single Greater Affix is more than enough. Find any item with the desired Greater Affix, lock it, and you get an item with that perfect Greater Affix accompanied by three optimal stats on top.
Starting the craft on a basic item
For the demonstration, Goblin-Inc starts from scratch: a simple magic ring (blue quality), with no interesting affixes to begin with. The idea is to show that you can build a near-perfect item from any base.
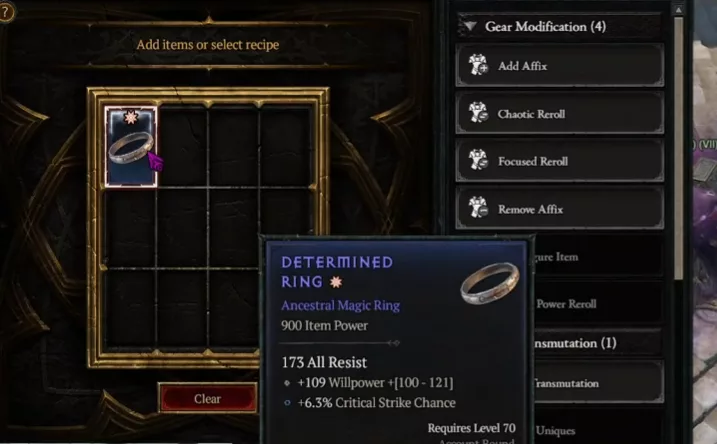
The plan is clear from the start: lock the Critical Strike Chance Greater Affix, then work on the two intermediate stats via rerolls. Willpower, the core stat of the Season 13 Warlock, is not touched right away.
The reason is simple: Willpower is added last because it is a guaranteed stat via the Adept Tuning Prism. No point wasting rerolls on it.
Chaotic reroll: targeting the defensive stat
With Critical Strike Chance locked, the objective is now to fix a defensive stat on the second affix. We are not trying to optimize values at this point, just landing on the right type of stat before moving on to the offensive side.
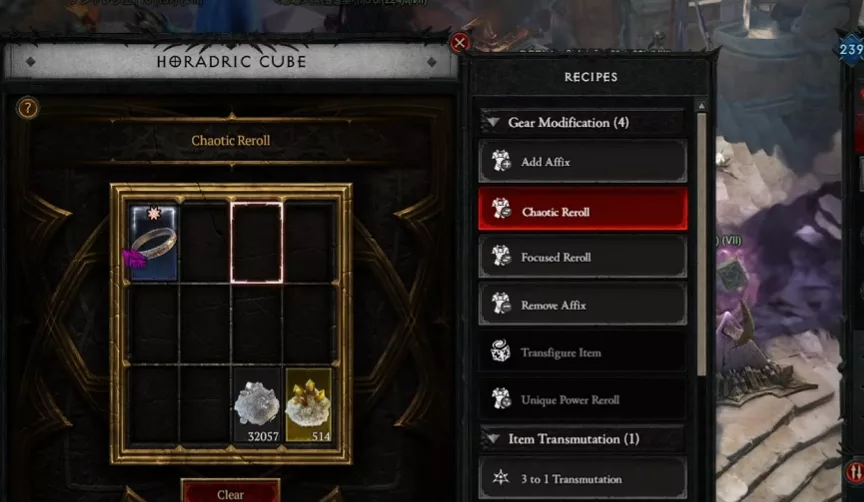

The chaotic reroll changes the stat randomly with each use. If you land on fire damage, shadow damage, or overall damage, those are offensive stats: you reject them and reroll. Here, after a few tries, Maximum Life appeared — a defensive stat. That is what we were looking for, so we stop there.
If another defensive stat had appeared first, such as Armor or a resistance, you could have switched to a targeted defensive reroll to force Maximum Life specifically. In this particular case, the chaotic reroll was enough in a few rolls.
Adding an offensive stat with an Aggressive Tuning Prism
The defensive stat is in place, now we tackle the offensive side. The objective is to obtain Critical Strike Damage on the ring, in addition to the Maximum Life already secured. To force the Horadric Cube Diablo 4 to add an affix in the offensive category, we use an Aggressive Tuning Prism, a crafting item introduced in Season 13.
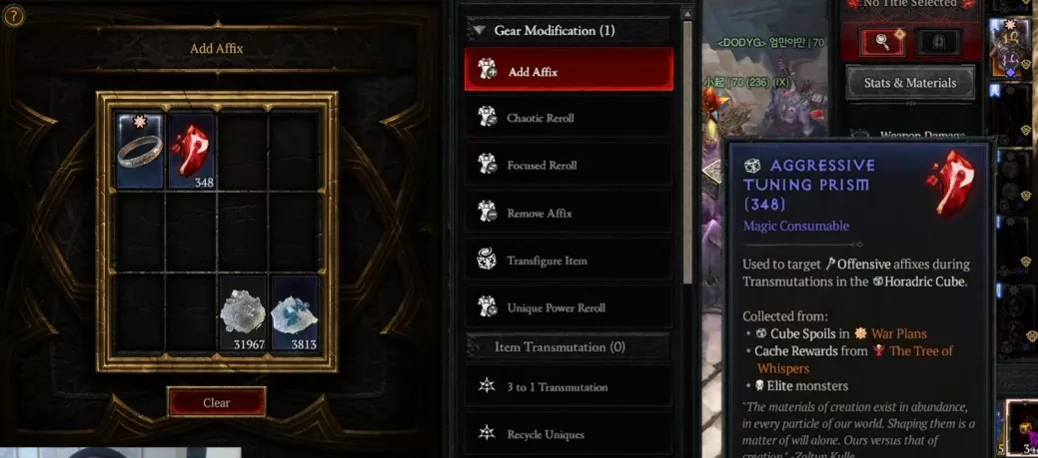
Unlike standard tempering, the Aggressive Tuning Prism constrains the category of the added affix: the result will always be offensive, never defensive or utility. This is what allows building such a precise combo on a single item using the Horadric Cube Diablo 4: Critical Strike Damage, Critical Strike Chance, Maximum Life, and Willpower. Four targeted stats, each obtained via the right crafting tool.
Focused reroll: locking in Critical Strike Damage
The offensive affix is now in place, but you still need to direct it toward the right stat. That's where the focused reroll comes in: by specifically targeting the offensive category, you can chain rerolls indefinitely on that affix without ever putting your Critical Strike Chance Greater Affix at risk. Without this technique, every untargeted reroll is a 50/50 chance of losing your Greater Affix — unacceptable at this stage of the Horadric Cube Diablo 4 crafting process.
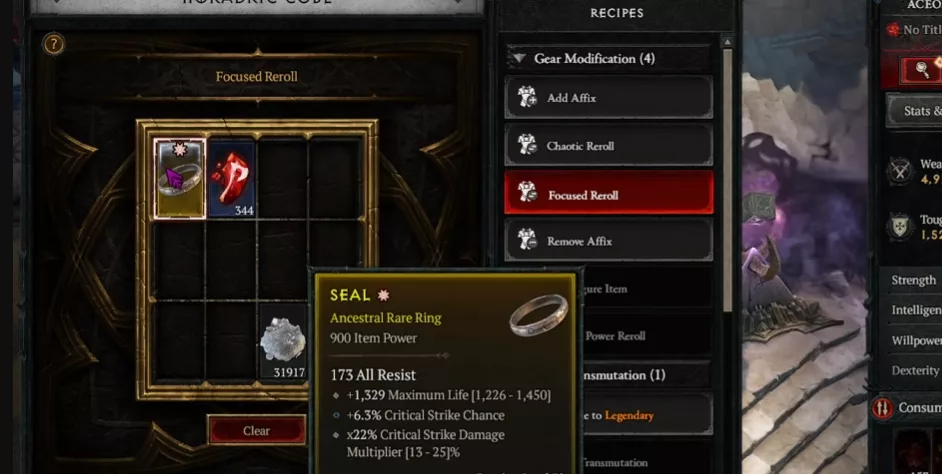
The focused reroll locks the affix category, not the stat itself. In other words, you're guaranteed to stay within offensive stats on every attempt — it's just the exact result that changes. You keep rolling until Critical Strike Damage appears, while Critical Strike Chance (your Greater Affix from the start) remains perfectly intact in its own slot.
At this point, three stats are permanently locked on the item: Critical Strike Chance as a Greater Affix, Maximum Life, and now Critical Strike Damage. Only one step remains to complete the craft.
The Adept Tuning Prism for the core stat, last
The item is nearly perfect at this stage: the affixes are locked, the critical strike is secured, and only one final touch remains. This is where the Adept Tuning Prism comes in — the last tool in the Horadric Cube Diablo 4 sequence, allowing you to add a guaranteed core stat in the final slot.
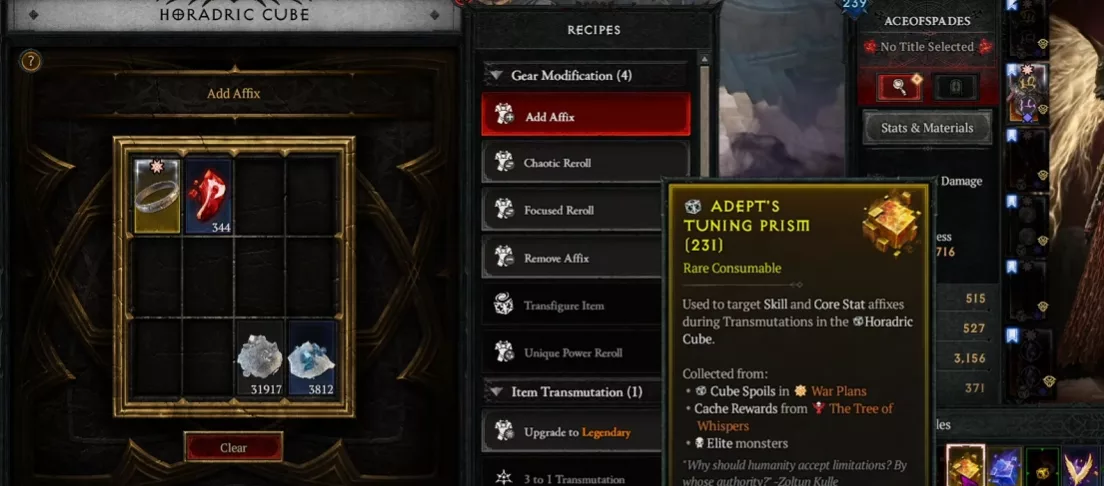
The Adept Tuning Prism adds a guaranteed core stat affix, specific to each class: Willpower for the Warlock and Druid, Strength for the Barbarian and Spiritborn, Intelligence for the Sorcerer and Necromancer. The addition is deterministic — no RNG, no reroll needed.
This step must come last for a technical reason: the core stat can be categorized as an offensive stat by the game. If it's added too early, it occupies the offensive slot and blocks any focused reroll targeting an offensive affix like Critical Strike Chance. By reserving it for the very end, you ensure all focused rerolls are completed before it locks anything in place.
The perfect item: a market that's about to collapse
This is the result everyone is chasing: a ring with exactly the four desired stats, no more, no less. What players used to spend weeks hunting on the market or rerolling and hoping for a miracle, the Horadric Cube Diablo 4 now builds in a completely deterministic way in Season 13.

The full recipe comes down to a few steps. On a 1 Greater Affix item: you start with the offensive GA you want, strip everything down until only two stats remain, add an offensive stat via a targeted reroll until you hit the perfect value, then finish with the core stat via the Adept Tuning Prism. On a 2 Greater Affixes item: same logic, but you start with Maximum Life as a GA and the offensive GA already present, then proceed identically for the two remaining stats.
The market consequences are immediate. Any item carrying a strong offensive GA, even with catastrophic stats on the other lines, becomes usable raw material. Buyers will start rationing listings as soon as they understand the technique, and sellers who were dumping "imperfect" items will adjust their prices upward. The segment of items with Maximum Life and an offensive stat as a Greater Affix will literally disappear from listings. The power gap between well-geared players and the rest of the playerbase just narrowed sharply — for those who master the Horadric Cube Diablo 4 sequence. If you're still wondering which build to play in Season 13 to make the most of these crafted items, now is the right time to decide.


0 Commentaires
Aucun commentaire pour le moment. Soyez le premier à commenter !