
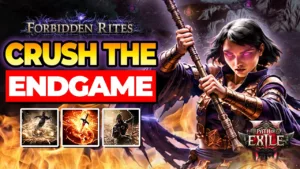
Build Video
Build Overview
This monk martial artist build leans on Lightning and near-infinite Power Charge generation. The core of the kit revolves around  Blasphemy which carries
  Repulsion as a curse aura. By linking Repulsion and
  Living Lightning II to Blasphemy, the aura behaves like a melee attack, which unlocks the use of the
  Culmination II support on it.
Every hit landed with  Whirling Slash builds up Combo, which instantly triggers the Repulsion attack-aura to consume that Combo — and it’s this trigger that, via
  Ailiths Chimes, recharges Power Charges in a continuous loop. The main damage comes from
  Falling Thunder and
  Tempest Bell, backed by
  Herald of Thunder for elemental propagation, while
  Ghost Dance handles passive defense.
According to the build’s author, this Monk Martial Artist scores a full 5 out of 5 stars in clear speed, single-target damage AND survivability — a rare profile for such a complete build. Expect around 500 divines for the full version shown in the video, with much cheaper versions possible if you accept more modest rolls on gear.
Strengths / Weaknesses
✅ Strengths
- Triple 5-star rating: clear speed, single target and survivability all excellent according to the author
- Self-sustaining Power Charges loop thanks to the combo Repulsion/Whirling Slash/Ailiths Chimes
- Dual Lightning damage source (Falling Thunder + Tempest Bell) that covers both clear AND bossing
- Reliable passive defense via Ghost Dance without sacrificing offense
- Scalable by budget: playable with more modest rolls than the 500 div version shown in the video
- Tested and proven on demanding content (Zarokh boss in a 6-player party)
❌ Weaknesses
- Requires a high-level Repulsion gem for the charge loop to work at full strength
- High budget for the optimal version (~500 div), even though cheaper variants exist
- Technical combo mechanic to understand before you can optimize it (chain Blasphemy → Repulsion → Whirling Slash → Ailiths Chimes)
- Requires careful attention when choosing the
 Ingenuity belt (charm mod required)
Skill Gem Setup by Step
This build offers 1 progression step from leveling to the final build. Select a step to see the corresponding gem setup.
SkillSet 1
10 skills • 40 gemmesBlasphèmeBlasphemy
 Héraut du tonnerreHerald of Thunder




 Grondement de tonnerreFalling Thunder


 Cloche tempétueuseTempest Bell



 Taillade tourbillonnanteWhirling Slash



 Spirit VesselSpirit Vessel


 Danse fantomatiqueGhost Dance

 Jet de lanceSpear Throw
 Régulation des chargesCharge Regulation
Spirit VesselSpirit Vessel
Régulation des chargesCharge Regulation
Spirit VesselSpirit Vessel
Recommended Equipment
The video emphasizes one specific piece of equipment that shouldn’t be overlooked when buying:
- Ingenuity belt: check that it has the « % reduced charm charges used » mod, or that it has no charm mod at all — a bad roll here directly penalizes the build’s defensive loop.
- Skill gem quality: always check this, as quality directly affects the kit’s effectiveness (especially Repulsion, which needs to be high-level to carry the entire charge mechanic).
- The full breakdown of equipment slots (weapons, armor, accessories, jewels) is available in the interactive grid below, taken directly from the author’s planner.
Gameplay Tips
- Prioritize the level of the Repulsion gem above any other investment — it’s what carries the Power Charge generation loop.
- Keep an eye on the quality of your skill gems, whether bought or crafted — an often overlooked detail that pays off well on this build.
- Adapt the budget to your own progression: the 500 div version shown in the video isn’t a prerequisite, more modest rolls are enough to enjoy the combo loop.
- Let the Blasphemy → Repulsion → Whirling Slash → Ailiths Chimes loop settle in naturally during combat — the Combo generated by Whirling Slash automatically triggers consumption via Repulsion.
Core Mechanic of the Monk Martial Artist Build: the Infinite Power Charge Loop
What sets this Monk Martial Artist build apart from most Lightning setups is the repurposing of Blasphemy: normally a simple curse aura, here it becomes a full melee attack once linked with Repulsion and Living Lightning II. This transformation unlocks the use of the Culmination II support, normally reserved for standard attacks.
The loop then closes naturally: Whirling Slash generates Combo with every hit landed, which instantly triggers the « attack » version of Repulsion to consume that Combo. It’s precisely this repeated trigger that, via Ailiths Chimes, regenerates Power Charges without interruption for as long as the fight continues — hence the « infinite » generation the build’s author refers to.
The Zarokh Boss in a 6-Player Group: Proof of Power
The video dedicates a segment to the fight against the boss Zarokh in a 6-player setup, content that’s noticeably more demanding than a standard solo encounter. This segment serves as a concrete demonstration of the 5/5 single-target rating mentioned earlier: the Power Charge loop, combined with the steady damage from Falling Thunder and Tempest Bell, holds up over the full length of the fight with no notable ramp-up lag.
Stat Priorities and the Role of Jewels
Beyond the skill gems, the video briefly touches on the passive tree, jewels, and the character’s priority stats. These elements reinforce the combo loop (attack speed, Lightning damage, Power Charge generation) rather than introducing a separate mechanic. The full passive tree and socketed jewels can be viewed in the interactive tree viewer further down in this article.
Passive Tree
📖 Retrouvez tous les builds et guides Path of Exile 2 : Voir tous les builds PoE2 →








0 Commentaires
Aucun commentaire pour le moment. Soyez le premier à commenter !