How to Farm Everything in Season 14: The Complete Overview
In his latest video, P4wnyhof breaks down every method to farm Pandemonium Fragments and get rich fast this season, alongside his Necromancer Army of the Dead Boss Killer build. You can stack up hundreds of Obols, fill your Horadric Cube material stash, and collect boss trophies to craft unique items without ever leaving town.
Pandemonium Fragments, regular Jewels, and Grand Jewels are also on the menu. Every loot source listed here boosts your odds of scoring Mythic items and beating the usual drop rates.
Here are all the essential farming tips for Season 14, starting with Pandemonium Fragments.
Pandemonium Fragments: The Best Farming Method
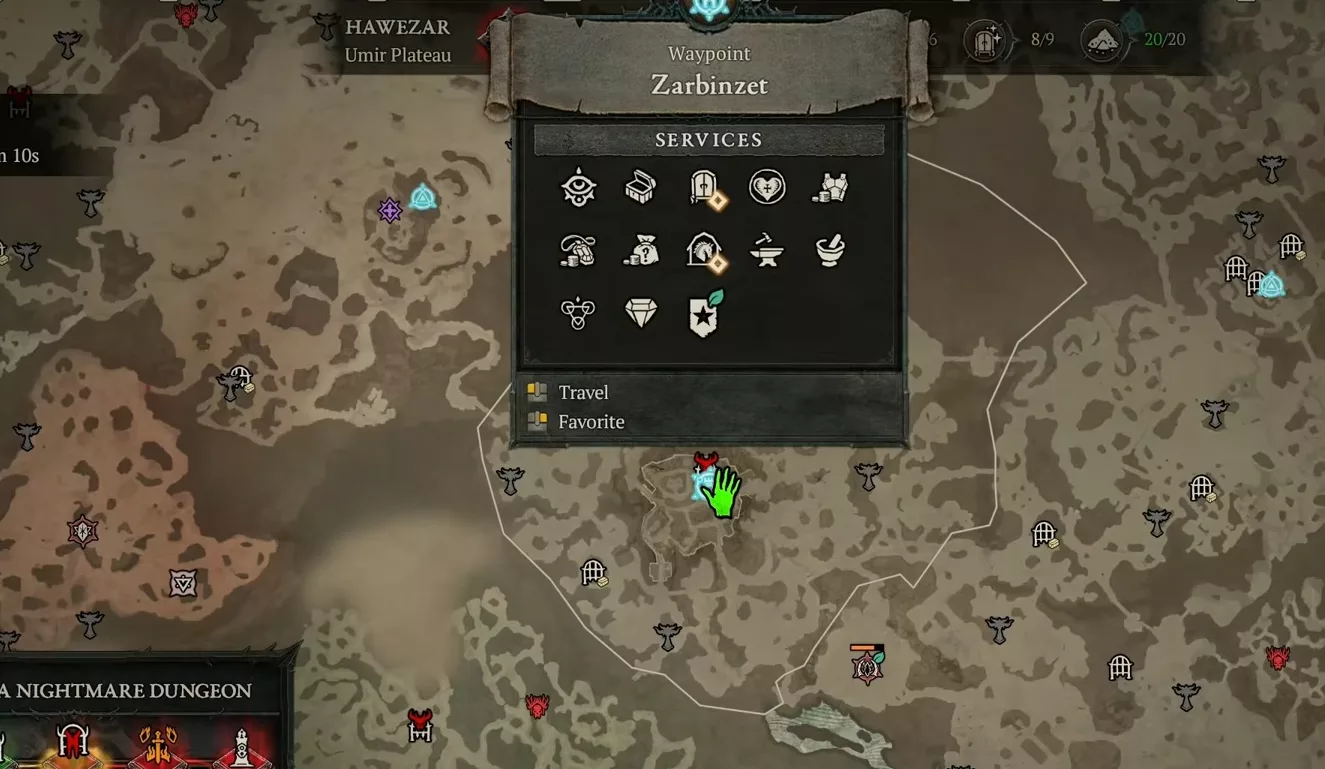
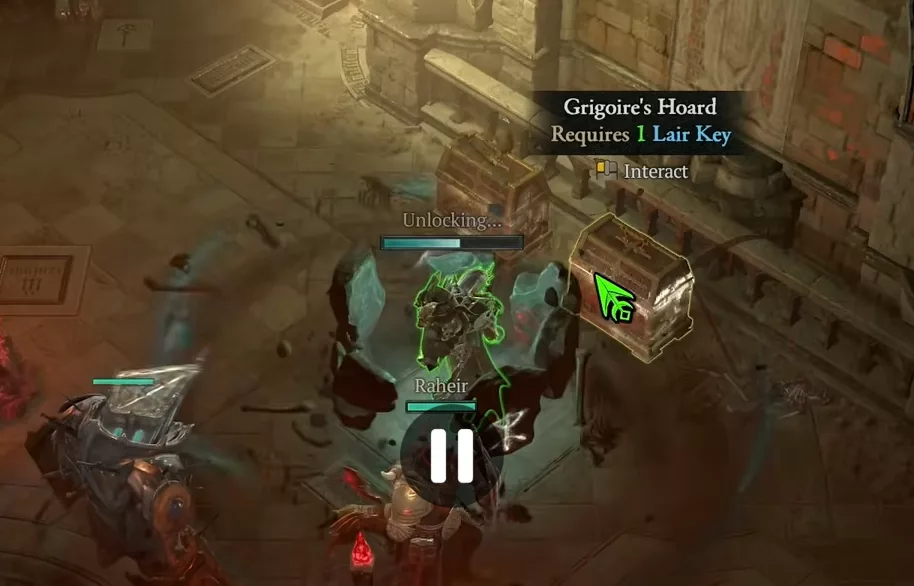
The number one source is still the Pandemonium Threshold at Zarbinzet. Just kill the boss found there, Varshan. No matter which Torment tier you pick, opening his Hoard Chest only yields a single Pandemonium Fragment. Even at Torment 12, it's still just one fragment, not a single one more. The loot itself is decent, with plenty of set charms, but the promised extra Mythics still haven't shown up.
The real bottleneck is access to Superior Lair Keys. Without them, there's no opening Varshan's chest. To get more, you need to kill regular and Superior Lair Bosses, hoping Belial shows up to invade the fight. Once Belial goes down, you get a Superior Lair Key, good for one more Pandemonium Fragment.
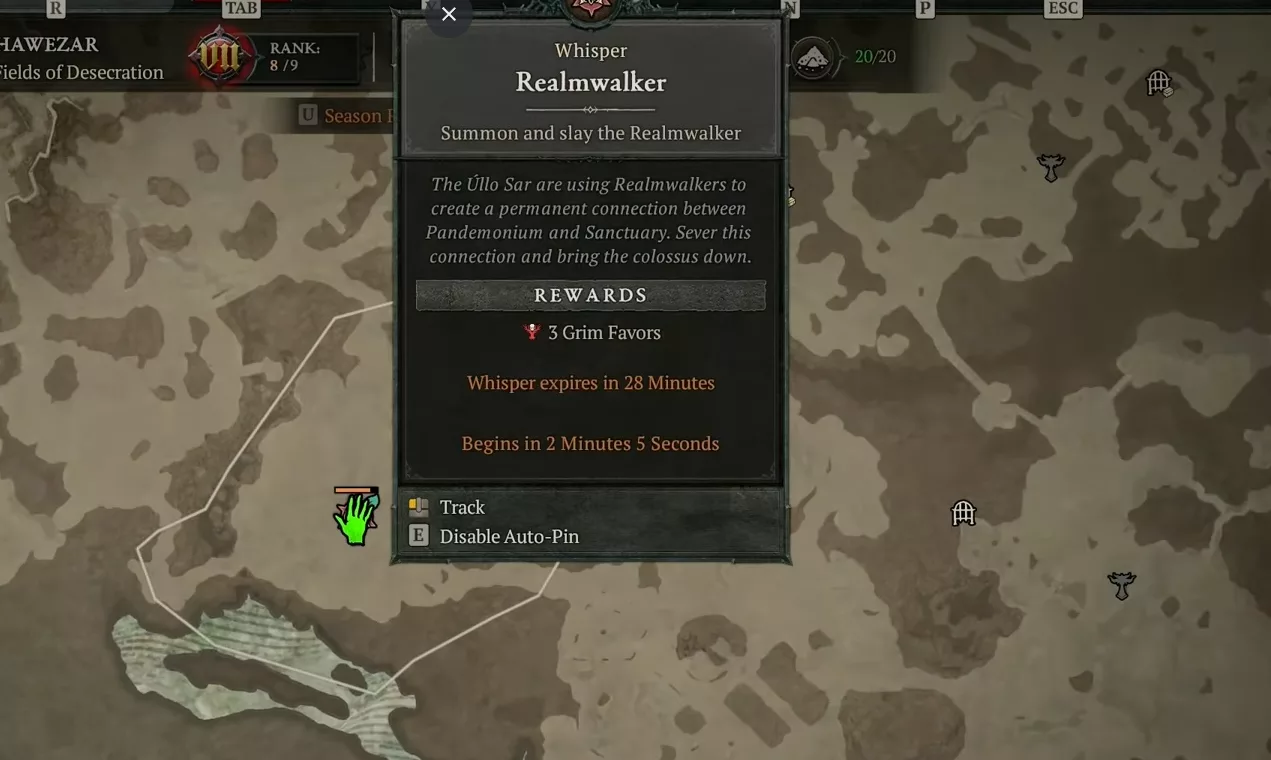
Another option: watch for the Realmwalker to spawn at Zarbinzet and rush into the Death Toll Chamber. A key can drop there too, even though the last three Realmwalkers encountered gave nothing. Nothing guaranteed on that front.
Technically, running Nightmare Dungeons with the Ruptures affix also works for this farm. But the method is slow and not very rewarding in practice. The most efficient solution stays simple: chain-kill bosses en masse to multiply your odds of a Superior Lair Key.
Gold, Obols, and Cube Materials: Nightmare Dungeon Escalations
Everything drops in the same place for this step. Nightmare Dungeon Escalations concentrate gold, Obols, and Horadric Cube materials into a single activity. No need to run in ten different directions.
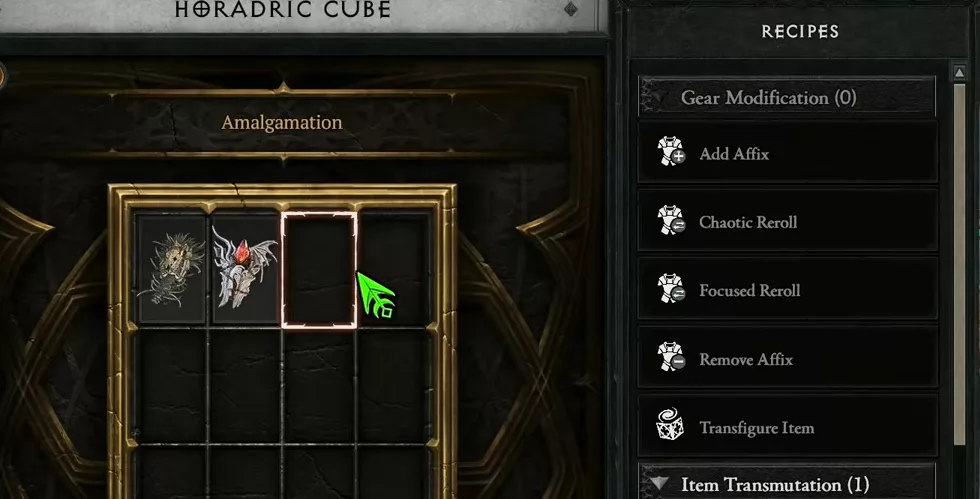
Creating a Nightmare Dungeon Escalation Sigil
If you haven't run one yet, head to the Horadric Cube. Combine five regular Nightmare Dungeon Sigils to get an Escalation Sigil. This sigil chains several dungeons back to back, with a final boss and a bonus choice between each stage.
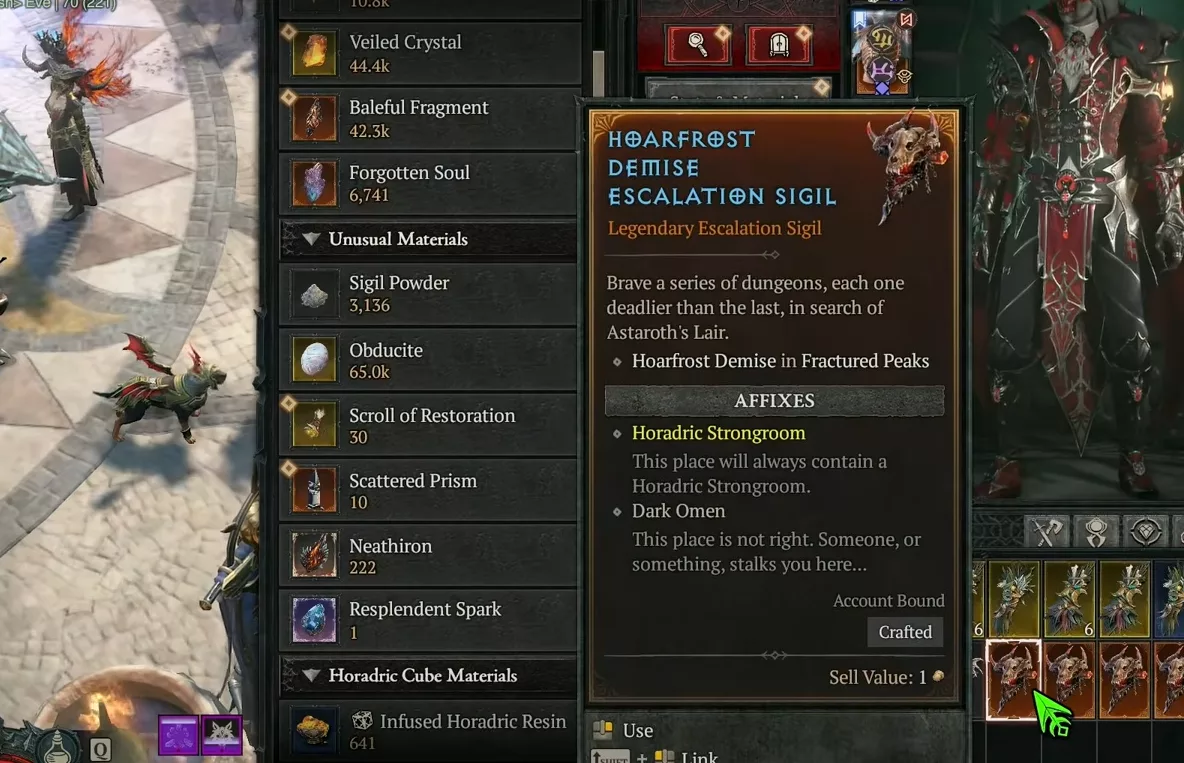
The result is a full-fledged legendary item, with its own reward affixes. Nothing complicated to craft, you just need five regular sigils of the same Torment tier on hand.
Before you dive in, a few War Plan nodes are worth unlocking to boost the final loot. They don't cost much and really change the outcome of the escalation.
War Plan Trees to Unlock Before You Dive In
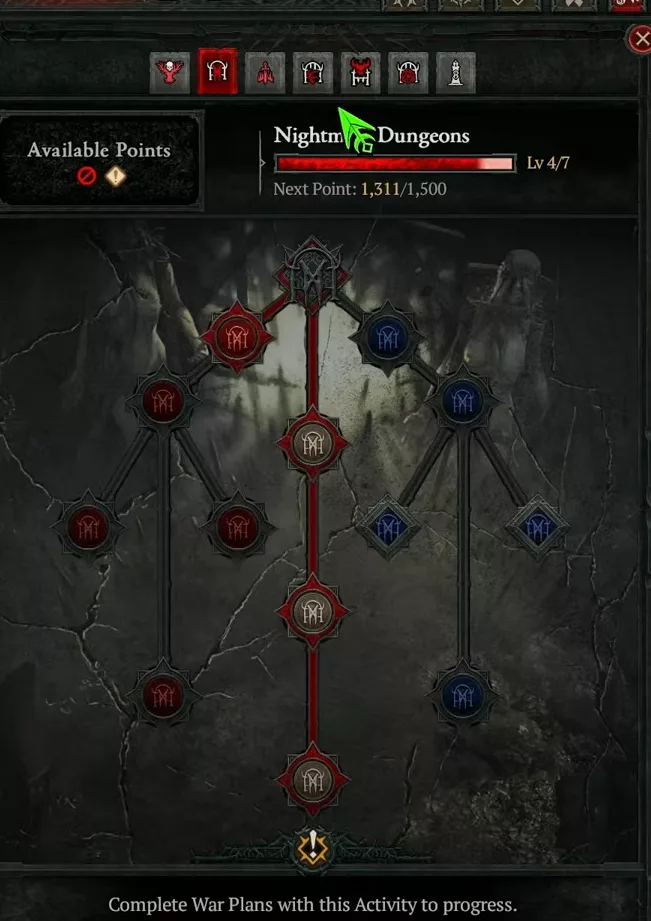
In the Nightmare Dungeons tree, reach the branches that give +400% efficiency, as well as the Waking Spoils node. This last one adds a bonus chest full of loot to every dungeon.
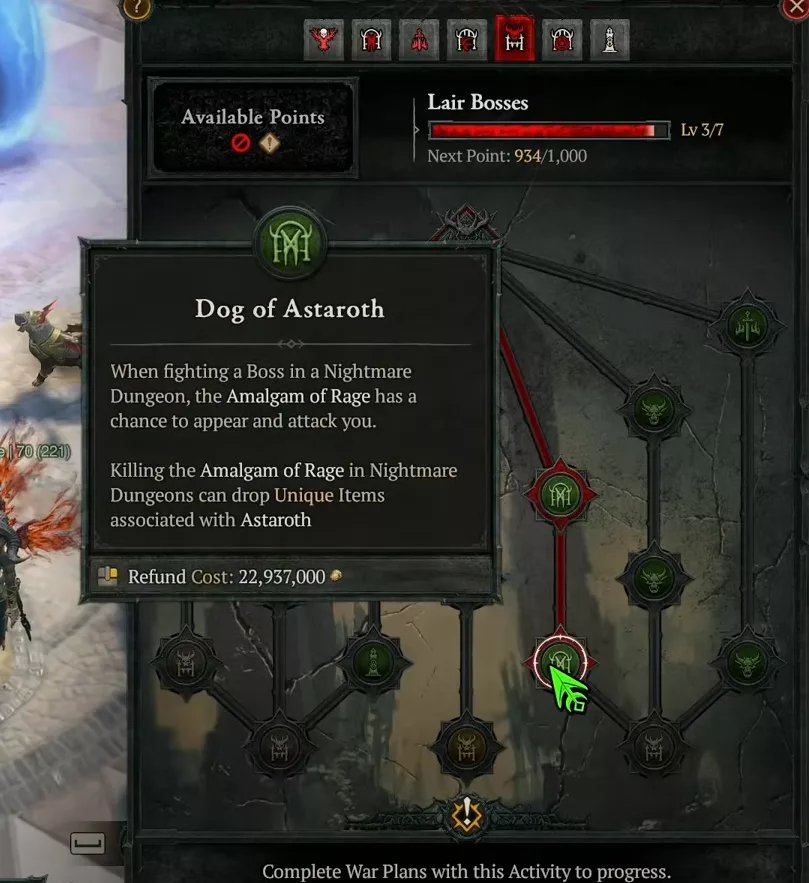
In the Lair Boss tree, push all the way to the Dog of Astaroth node. It triggers an extra ambush before the boss fight, with more loot on the line.
In the Helltide tree, unlock the Meat Browsers node and the Night Terrors node. Together, they turn Damned ambushes encountered in Helltide into Butcher spawns as soon as they occur inside a Nightmare Dungeon, with Profane Mindcages and an XP bonus on the line.
Preparing Your War Plan Before the Escalation
Check that your War Plan shows two Nightmare Dungeons in a row, or the Escalation itself, to enjoy an extra XP bonus.
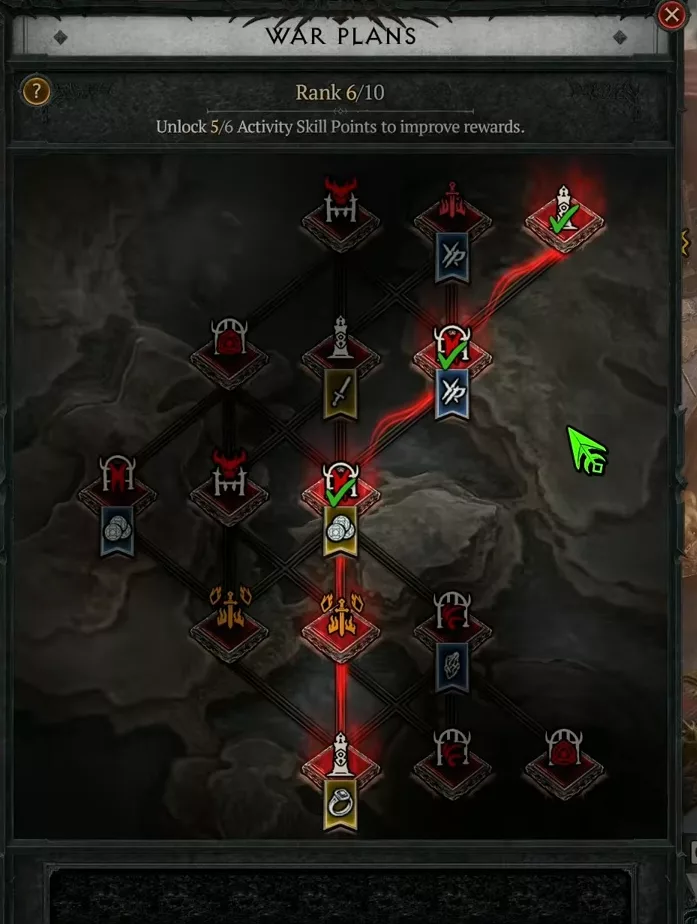
Pick an escalation with a good starting bonus if possible, like the Dungeon Delve option or the Material Reserve, Gold Reserve, and Opal Reserve options. But remember this above all, dungeons 2 and 3 matter far more than the first.
First Dungeon: Speed and Maximum Torment Tier
Chain the first dungeon with a mobile build, at the highest possible Torment tier. The higher the tier, the better the rewards. Ignore the Horde Rooms, they're not worth the detour here. Kill the boss and move to the next choice.
Once the boss goes down, a first bonus choice opens up for dungeon 2. Vile Splendor increases the gold collected. Forgotten Wisdom boosts the experience earned. In this run, the choice was Obols Reserve, which doubles Obol rewards and makes all Obol chests permanently visible on the minimap.


The result shows immediately. The haul went from about 4,000 to 12,000 Obols in a single dungeon, just from this bonus choice.

Dungeons 2 and 3: The Bonuses That Change the Game
The third dungeon offers even more generous bonuses. The choices encountered include Opal Reserve, Obols Reserve, Dungeon Delve, or Gem Reserve. This last one was skipped here, a more efficient method exists to farm gems elsewhere.
With the Gold Reserve option, every chest hands out between 15 and 20 million gold, and the final boss drops several hundred million. The best recorded run brought in 250 million gold from a single escalation.
The Material Reserve option provides hundreds of Horadric Cube materials, enough to reroll the affixes of a full gear set without limit.
This run ended with 18,000 to 19,000 Obols in the bank, more than enough to reroll every desired affix on your gear.
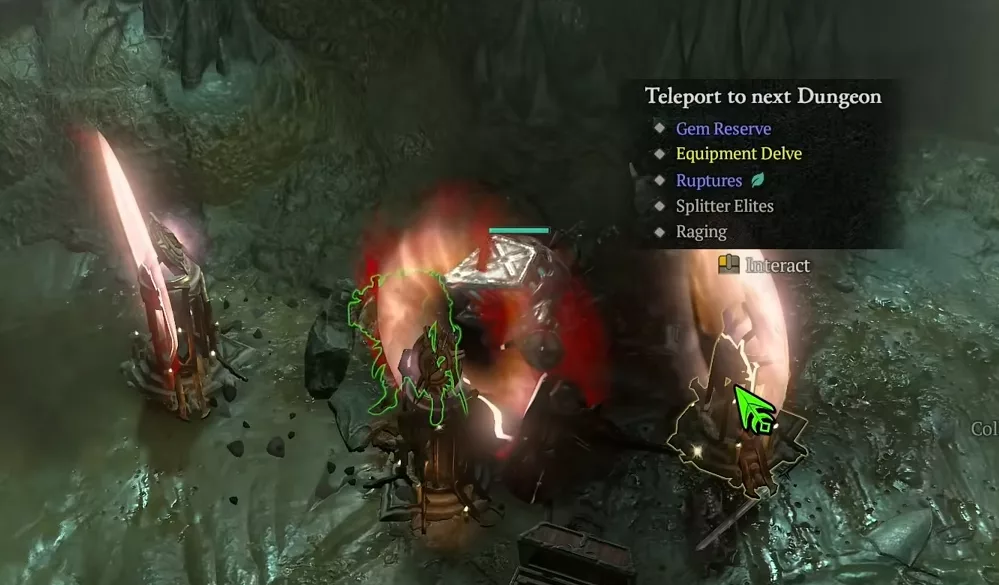
The Final Choice Before Astaroth
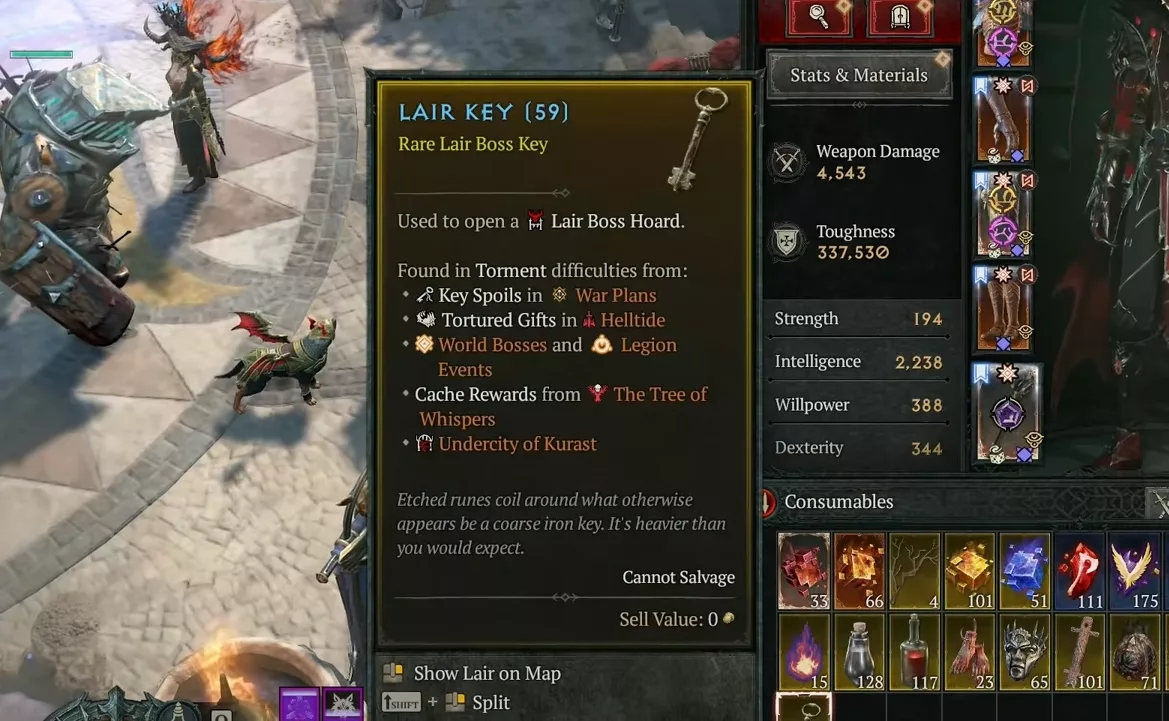
Empty your inventory before the final escalation choice. Three main options appear, Lair Keys, Legendary Loot, and Unique Loot, sometimes with variants called Key Wealth or Material Wealth.
The choice made here combines the yellow Lair Keys, Unique Loot for unique items, and Legendary Loot. Add the Astaroth's Armageddon affix to make the fight harder but much more generous in rewards.
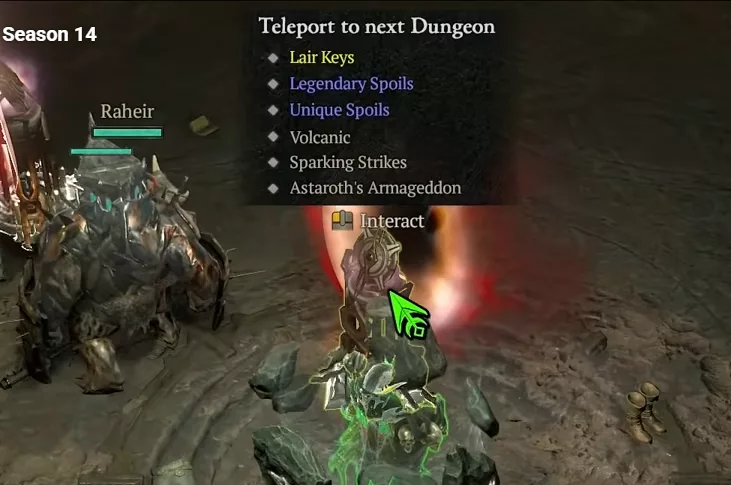
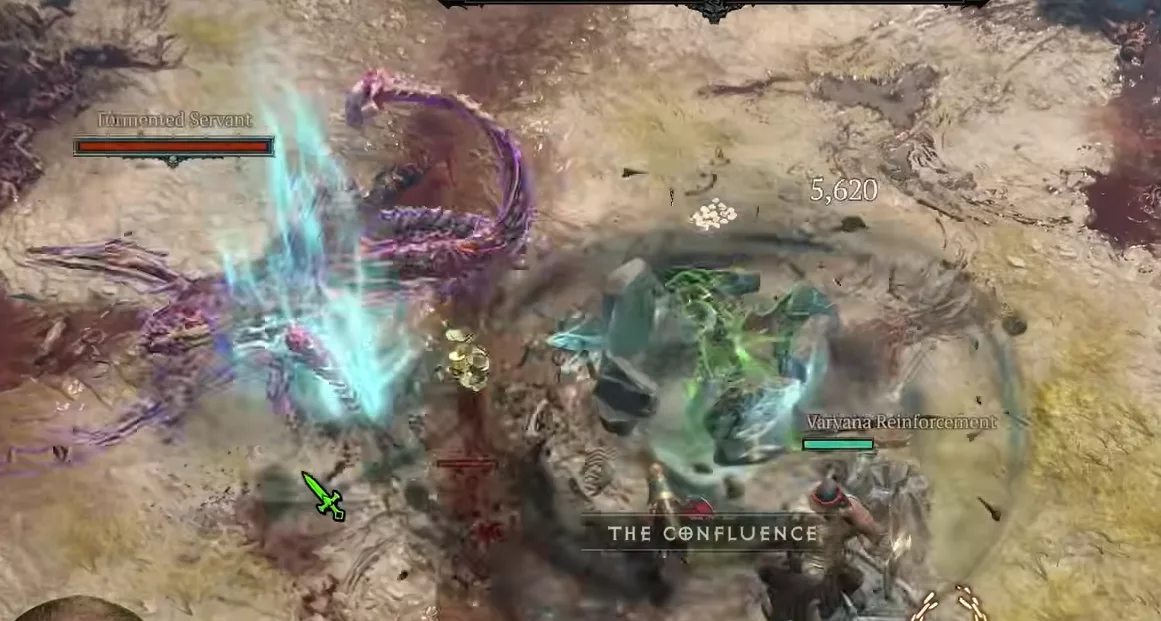
Astaroth soaks up an enormous amount of damage, and his minions deal billions of damage over time if you let them linger. Once the boss is down, the loot includes 3 Lair Keys and a Tribute of Harmony. The Material Reserve option adds even more Forgotten Souls, Opticide, and plenty of other Cube materials.
Boss Trophies and Experience: The Helltide Method
Boss trophies come from Helltides. Rush to the central zone to target "Writhing Rod" and "Bursting Brute," two unique items worth the detour.
First step, join a Helltide and build up your Threat meter to 2/3. The fastest way is the seasonal portals, especially when several overlap. They spawn more enemies, and it goes even faster with multiple players.
Once the meter hits 2/3, sweep through the Helltide looking for Maggot spawns. The map on helltides.com helps you spot them quickly. Killing a single Maggot yields 3 boss trophies, a mountain of XP, boss Lair Keys, and regular Lair Keys. Keep hunting for them until the event ends.
The Pit of Duriel also brings boss materials and likely an extra Lair Key, plus Cinders to spend.
Check that your War Plan matches your current goal. You need gold, XP items, materials for the Horadric Cube, and Talisman pieces. There's apparently even a plan for Pandemonium Fragments, rare and unconfirmed by the creator, even though one viewer claims to have gotten one.
Big Superior Helltide Harvests offer a solid XP bonus, especially combined with "Bursting Brute" and "Writhing Rod." The efficiency climbs even higher with Profane Mindcages picked up from Meat Browsers or Night Terrors.
Grand Jewels: Farming the Sears Reach Dungeon on Loop
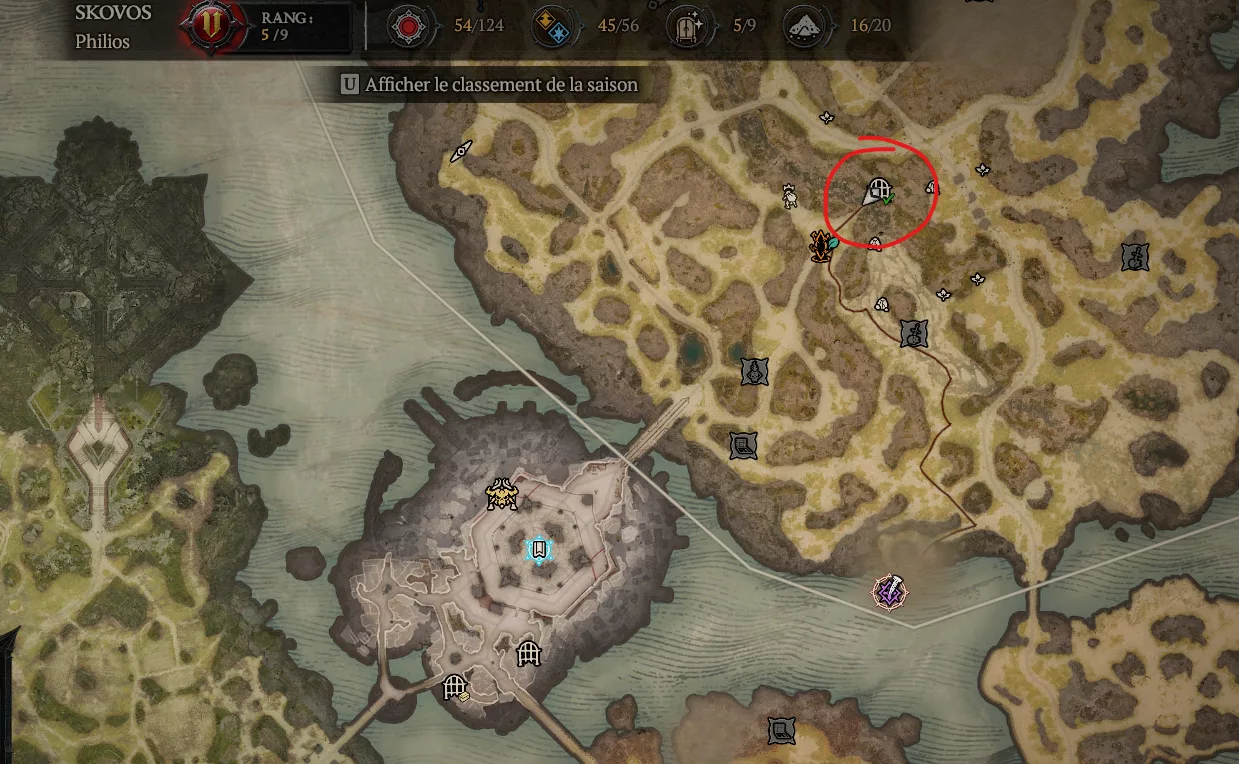
Grand Jewel farming has never really been fixed. But a much more convenient method now exists. Right next to Teis, across the bridge in the top-right corner of the map, there's a dungeon called Sears Reach.
Clear it as fast as possible. This farm works from Torment tier 1 onward, with excellent rewards. A jewel that gives 22% bonus damage, or a stack of defense, on a brand-new character straight out of our Sorceress Blizzard leveling build at Torment 1, that changes an entire run.
To speed up the loop even more, open the map and drop a marker on the right side of the zone. The boss almost never spawns there. Leave the dungeon, reset it, then go back in. The marker stays in place despite the reset.
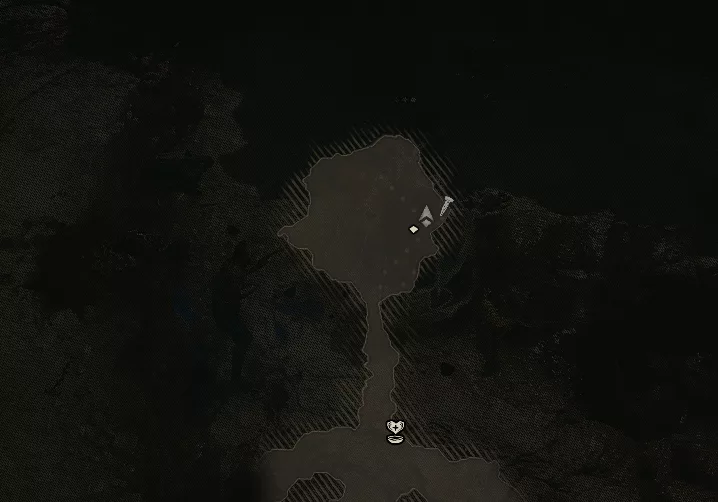
Then reopen the map to spot your marker and the boss's position, and rush straight to him without killing anything else along the way. More jewels per minute, less time wasted. Just one trap: never walk back over your marker, or it disappears and you have to start all over.
The boss can also drop trinkets and items with a Greater Affix. A higher Torment tier improves these side rewards, but the jewels themselves stay the same no matter which Torment you choose.
Unlike Pandemonium Fragments, this jewel farm doesn't depend on any key or any specific boss, just on execution speed inside Sears Reach.
Mythic Items: The Method to Maximize Your Odds
Only one crafted Mythic can be worn at a time. This rule includes an item upgraded into a Mythic, but also any item forged at the Blacksmith or the Jeweler, which counts as "crafted."
Bad news. The best method to get Mythics is still intensive Lair Boss farming. Looking for the ![]() Crown of Lucion? Chain-kill Astaroth, like in our Paladin Winged Strikes speedfarm build, which specifically leverages this Mythic. For "Reaper's Wraps," target Harbinger of Hatred on repeat, at the highest possible Torment tier. Out of roughly 30 Lair Bosses and Superior Lair Bosses, the guide's creator only got a single Mythic.
Crown of Lucion? Chain-kill Astaroth, like in our Paladin Winged Strikes speedfarm build, which specifically leverages this Mythic. For "Reaper's Wraps," target Harbinger of Hatred on repeat, at the highest possible Torment tier. Out of roughly 30 Lair Bosses and Superior Lair Bosses, the guide's creator only got a single Mythic.
Intensive Lair Boss farming also feeds your Pandemonium Fragment stock mentioned above, Superior Lair Keys pile up the same way by chaining fights.
There's a lever to boost your odds. The higher the Lair Boss's Monster Power, the better the rewards climb. Two options are available to you. The Greater Nemesis Lair, drawn at random, or the guaranteed Monster Power bonus paired with a double Hoard Chest.
This double chest hides a trap. It doesn't increase the chance of a Belial ambush happening a second time. If you take the Lair of Plenty node and kill the boss, always open the normal chest first, never the bonus one. Only the normal chest can trigger the Belial ambush.
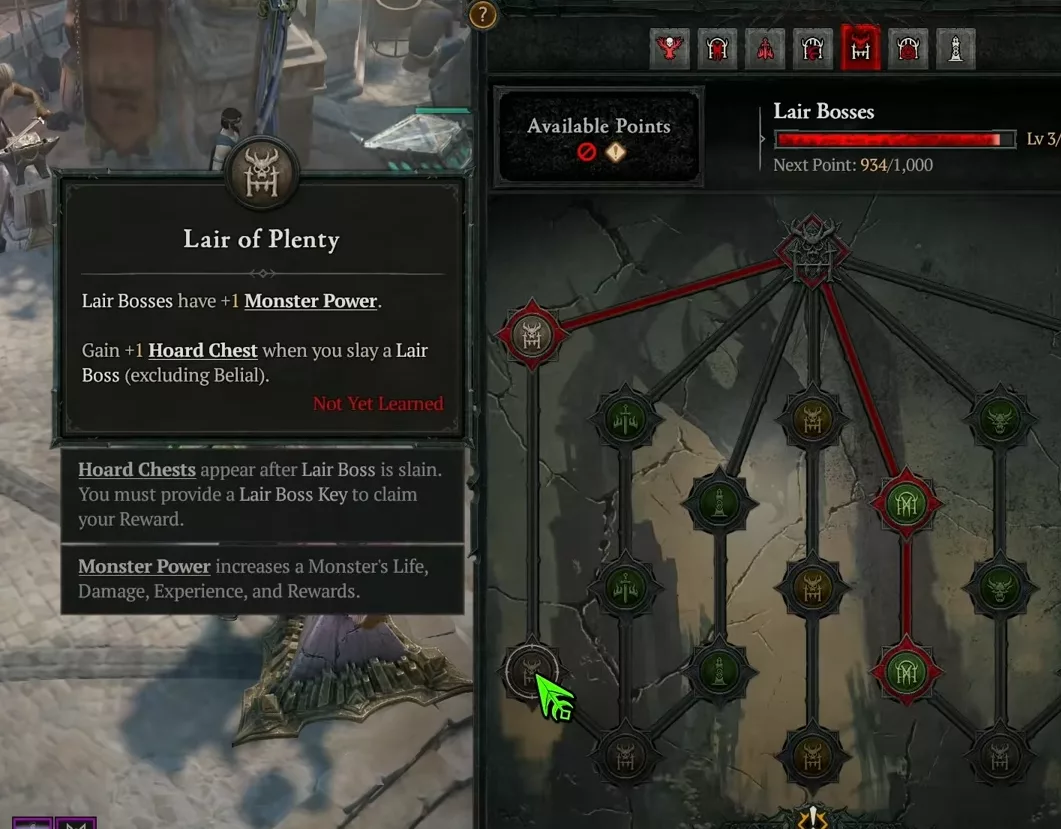
To maximize the number of Belial ambushes, open only one chest then reset the boss immediately. If you're hunting a specific item instead, open both chests at once.
Undercity: Optimizing Your Tributes
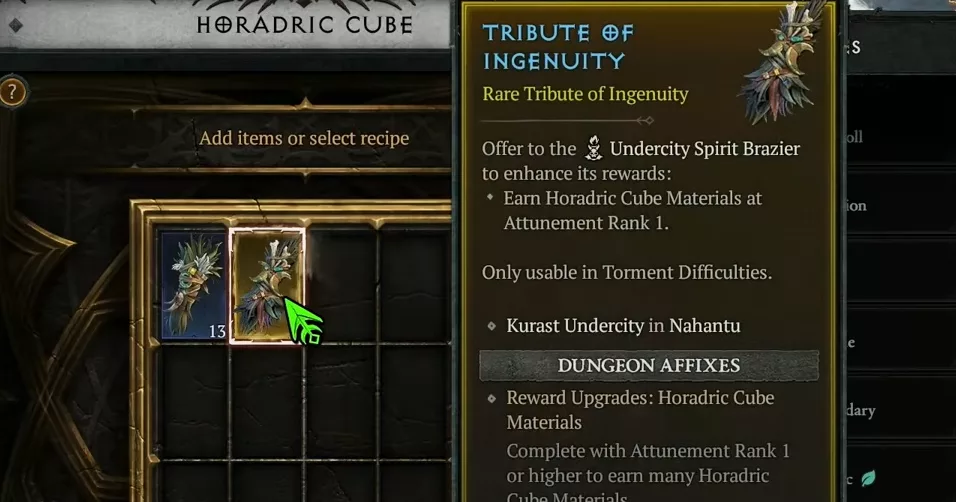
The Kurast Undercity hands out all kinds of tributes. Some give refinement materials, fairly minor. Others reward you with runes, talismans, legendary armaments, or Horadric Cube materials. One simple rule applies here. Never spend a low-rarity tribute. Recycle it in the Horadric Cube instead to get a higher version.
The Lesser Tribute of Ingenuity is a great example of this principle. Once recycled, it turns into a Tribute of Ingenuity, which unlocks better Horadric materials. The payoff is well worth the investment.
Same logic for the Tribute of Armaments, which can be recycled into a Mythic Tribute of Armaments. This version has had its power reduced but remains formidable. Don't rush into it, though. First progress your Undercity up to Gutterfilth rank (an advanced tier of the zone's progression).
This progression changes everything. Activating a beacon in the Undercity gives a small chance to summon a Portal Prankster. The more you run into, the more chests appear, plus a bonus tribute chest tied to your latest challenges and tributes. These bonus chests aren't worth much on their own. Aim for at least three points at Gutterfilth rank before collecting them. The rewards follow naturally.


0 Commentaires
Aucun commentaire pour le moment. Soyez le premier à commenter !