
Build Video
Build Overview
This Huntress build  Stormcaller Arrow relies on a fairly unique combination of mechanics: the Spirit Walker ascendancy triggers
  Primal Bounty every six seconds on a dodge roll, empowering our next projectile attack with additional projectiles and a greatly increased projectile speed. Thanks to the lineage support gem
  Olroths Conviction, this empowerment applies not to one, but to three consecutive skill uses.
The centerpiece remains the unique bow  Lioneyes Glare (Lioneye’s Glare), which repeats our bow attacks twice with no damage penalty or cooldown, in the style of
  Barrage. Each repeat retains the Primal Bounty empowerment, giving us nine empowered projectile volleys every six seconds. It’s all driven by Stormcaller Arrow combined with
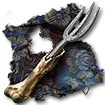
  Fork (Fork) and
  Frost Wall: by shooting our own ice walls, Fork splits on the ice fragments instead of on enemies, generating a rain of overlapping lightning novas that shred everything in the area.
For the Fork to work without ruining single-target damage, you need to drastically reduce the character’s « presence » area (via the unique ring  Grip of Kulemak and several passive tree nodes) so that nearby enemies don’t redirect the projectiles back at them. On the defensive side, the author relies on a classic ward setup with
  The Brass Dome and
  Remnants of Kalguur, topped off with
  Mageblood for movement convenience.
Strengths / Weaknesses
✅ Strengths
- Phenomenal clear: overlapping
 Thunderstorm novas turn enclosed spaces into total carnage, with arrows lodging and exploding indoors.
 - Relatively affordable setup: the author finished the build mostly with rare gear and materials already on hand, without a massive investment.
- Solid defenses via Astral Ward: the Copper Dome combo + Remnants of Kalguur holds up even on triple-tablet Delirium/Breach content.
- Immunity to extra critical strike damage thanks to the Copper Dome, very useful on maps with critical strike modifiers.
- Huge room for improvement:
 Garukhans Resolve, a better ring/amulet, or a corrupted bow can multiply the damage without changing the build’s structure.
❌ Weaknesses
- Very weak single target: against an isolated enemy, Fork (Fork) makes projectiles deflect instead of exploding on the target, making lone rares a pain to kill.
- Dependent on presence area management: without the Grip of Kulemak ring and the reduction nodes, the whole Fork/Frost Wall combo loses its point.
- Expensive lineage pieces: Olroths Conviction (about 11 divines at the time of recording) and
 Rakiatas Flow are costly purchases but nearly essential to the concept.
 - Game stability could be better: the author reports frequent crashes with this setup on intense Delirium/Breach content (a patch issue, not specific to the build).
Skill Gem Setup by Step
This build offers a single skill gem setup covering the whole progression.
Set 1
9 skills • 39 gemmesMunificence primitivePrimal Bounty
 Protecteur sauvageWild Protector




 Ruée vivaceVivid Stampede




 Projection de sortilègesSpellslinger
 Reliquats de ManaMana Remnants

 Flèche mande-orageStormcaller Arrow

 Remnants of KalguurRemnants of Kalguur
Mur de glaceFrost Wall
Remnants of KalguurRemnants of Kalguur
Mur de glaceFrost Wall





 Héraut du tonnerreHerald of Thunder



Recommended Equipment
- Bow: Lioneye’s Glare — ideally corrupted with +1 extra arrow, or in a triple-socket version if you have enough to fill them. A non-replaceable piece, it’s the one that makes the entire repeater combo work.
- Secondary weapon set (weapon-swap): a wand with as many levels as possible for Frost Wall (ideally level 21 with corruption) plus critical strike chance, paired with the unique Effigy of Cruelty — spell critical hits apply Critical Weakness stacks, which gives a good crit window right before placing a Frost Wall on the boss.
- Quiver: more levels to projectile skills, additional Fork (Fork), critical strike, projectile speed and flat damage on a prefixed quiver base.
- Amulet: more levels to projectile skills, life, critical strike, attributes and resistances to round it out.
- Gloves: fractured T1 life roll, then chaos-rolled until getting flat lightning damage and T1 physical on a prefix (desecration), with a rune granting life and mana on hit per target struck.
- Helmet: Ancestral Tiara base with Astral Ward, rarity, life and resistances.
- Chest: Copper Dome, triple socket, increased Astral Ward — the immunity to extra critical strike damage is invaluable on maps with 6 modifiers.
- Ring 1: Grip of Kulemak (unique) — this is the piece that provides the presence area reduction essential to the Fork/Frost Wall combo, plus a light radius reduction bonus.
- Ring 2: rare, flat damage and rarity to farm more currency, rounded out with life/resistances (the build isn’t chaos-resistance capped by default).
- Belt: Mageblood for convenience (resistances, movement speed, skill speed) — replaceable with a rare resistance/life belt if you’d rather invest elsewhere.
- Boots: movement speed, resistances, attributes.
- Charms:
 Life Drain on use, and increased charge gain to keep its uptime.
Gameplay Tips
- Don’t try to kill isolated rares with the main combo: instead, drop a Frost Wall right in front of them to artificially create an impact point and force Fork to explode properly.
- Watch your presence area (visible on hover in the UI): the smaller it is, the more effective your Fork/Frost Wall combo stays on a single nearby target.
- Prioritize buying Olroths Conviction before Rakiata’s Flow if your budget is limited — it’s the piece that turns one empowered attack into three.
- Without Rakiata’s Flow, replace it with an exposure skill (
 Frost Bomb) and elemental penetration picked up from the tree to recover some of the lost damage.
 - Without Mageblood, make up for the missing movement speed with the movement nodes on the tree or the
 Laviangas Spirits mana flask paired with the attack speed node.
The Fork + Stormcaller Arrow + Frost Wall Combo
The core of the build relies on a projectile mechanics trick: normally, multiple projectiles from the same attack can’t hit the same target more than once (no « shotgunning »), except in special cases. Stormcaller Arrow gets around this rule in a different way: the projectile embeds itself in an enemy or the terrain, then triggers an area nova at the point of impact. With several targets nearby or a generously stacked Frost Wall, these novas overlap and deal multiple instances of damage.
Fork (Fork) changes everything: applied to Stormcaller Arrow fired at a Frost Wall, the arrow no longer embeds itself in the targeted enemy but instead splits into two projectiles that bounce between other ice fragments, each one triggering its own nova. By maximizing the number of possible forks (up to a 100% chance of an additional projectile), you get a chain of explosions far greater than what a standard attack could produce.
Shrinking Your Presence Area for the Combo to Work
Fork requires that no enemy be inside the character’s « presence » area in order to correctly repeat onto ice fragments instead of veering off toward enemies. The build combines the unique ring Grip of Kulemak, several presence area reduction nodes on the tree (including one node with 25% reduction), and the « All for One » enchantment on the amulet to shrink this area down to a tiny circle. Without this reduction, the Fork/Frost Wall combo loses most of its value, as the projectiles end up hitting nearby enemies instead of staying on the ice fragments.
Defenses: the Ward Combo
The build’s defenses rely on a proven ward setup: Copper Dome for massive armour and immunity to extra critical hit damage, combined with Remnants of Kalguur and a solid amount of life. This setup holds up comfortably on triple Delirium tablet content, even in a Delirium + Breach setup with many rares to handle at once. The author doesn’t recommend over-investing in pure ward: life remains the foundation of survival, with ward as a complement.
Upgrade Paths
Several avenues can meaningfully improve this build without changing its structure. Garukhans Resolve, a lineage gem that grants guaranteed maximum critical strike chance on modified attacks, fixes the main flaw of the Lion’s Eye Gaze bow: its very low base critical chance. A corrupted bow with an extra arrow, better rings, and a better amulet with a higher level bonus to projectile skills round out the list of most cost-effective upgrades, without requiring a gem setup overhaul.
Skill Tree
📖 Retrouvez tous les builds et guides Path of Exile 2 : Voir tous les builds PoE2 →









0 Commentaires
Aucun commentaire pour le moment. Soyez le premier à commenter !