
Iron man – Lonely Artisan Challenge Guide
Lonely Artisan is a solo challenge which can only be completed by a fresh character that has not prestiged. This is an intermediate trial that is relatively easy to complete. This is completely doable on anyone’s first attempt with proper care and attention paid.
The goal of this challenge is to level from 1 to Max level using only professions. This sounds easy until you realize, you get no experience from quests, kills, exploring or other means at all. Neither do you have access to the Auction house, grouping, or trading with anyone. This is truly solo.
All you buddy.
So what does this mean? Well, this means one thing: pick a race, faction and then take a starting build from the recommended builds or archetypes. This will allow you to get guaranteed mystic scroll cause you are going to have to kill things along your journey.
This guide can be applied to either Elune: Wild card or Area 52: free build.
Build –
As for the build that I chose to complete… well that is the kicker, I was still fairly new to ascension. One character max level, then immediately into trials. I was dumb and didn’t do an archetype instead doing everything by myself instead spending resources as I earned them in game.
This is partially why I am making this guide. To better help and guide newer players towards success.
So, now that the stupidity of the writer of this guide is out of the way, what would he recommend?
For your race and faction I would recommend Night Elf from the alliance. Why? Well the racial is the strongest racial for survivability in the game.
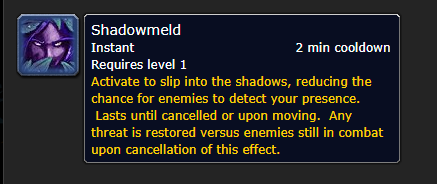
This allows you to escape notice from mobs in the game that you pull by accident, or if you are riding around on your mount farming mats and you don’t want to have to kill something to get that node.
As for the routing that I discuss in this guide it truly doesn’t matter what faction or race you choose, it’s just the one I find easiest to use.
So, I haven’t told you what build to use. Be patient, trust the process.
When it comes to builds, again it doesn’t really matter. The guide will not have you soloing high level content before you are ready. There are a few times that I will discuss advancing to a zone that is a higher level than you, but at that point in the game it will not matter as your build will be fully functional at that point.
When it comes to archetypes, I chose to follow a Hoplite build, specifically this one posted by Deathexpress

Now unless you want to do this the manual way, just grab the Hoplite archetype at level 1. That way you get access to the enchant starting the game and can get the process started right away.
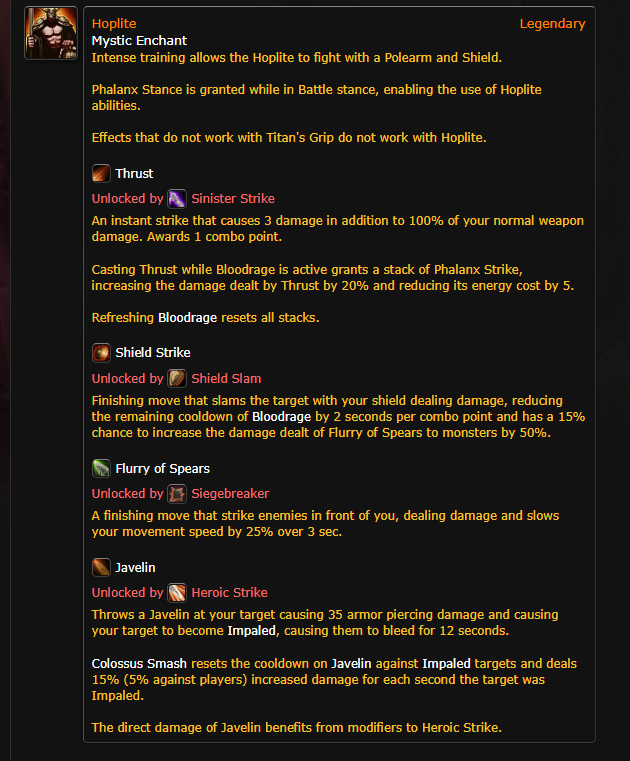
What if I don’t want to play a Rogue/Warrior hybrid you ask. Well, that is where it gets fun. Grab anything that catches your fancy. If you want my recommendation, or want to know what I would grab if I have to do this challenge again.
I would tell you to choose one of the DPS healer builds. Cryotherapy, Grove Ranger, Surgeon or Vamp lord. The survivability of these builds is unheard of and will make the leveling experience tolerable if not fun. As a DPS healer you will still be able to kill things while remaining safe to do so.
If you are looking for more than just a casual overview, this is not the guide for that. There are not a lot of guides out there for builds and even fewer about challenges and trials (Which I will be posting an alternate guide to the hardest challenge in the game at the time of writing this which will contain build details. Dungeon Delver) but this is not that and it is not as important as the other information I will provide within this guide.
Preparation –
You have picked your race, faction and archetype. You have logged in and want to start the trial. Stop and read this trough at least twice before you begin to tackle this challenge.
At level 1, you will need to do two things. The first is to ensure that you don’t gain experience, loot anything and interact with other players. Second, is to prep any purchases from the Ascension store before you start.
Now this is not an endorsement of the pay to win model that exists within the game. However, there are some quality of life things I want you to consider before you start. These are in no way mandatory and I will be discussing the way to level using several different profession combos that will ensure you climb to max level efficiently and safely.
If you will not purchase anything, skip ahead to the Routing Section of this guide. If you have some prep work let’s break this down for you.
When it comes to completing this guide and having some nice Quality of life assets there are a few things that can be purchased on the shop for real money.
The first part will be an overall one time purchase that will enable you to spend your time effectively and efficiently.
For 100 DP, this is the gold currency you get for spending real money.

You are able to purchase a bundle called “Celestial Observer’s Elite Warchest”

Contained within are several key resources that will help tremendously.
- Destined Book of Ascension (Which is a class trainer book that allows you to train skills out of cities) – Simply a quality of life
- Tome of Riding Apprentice and Journeyman (Rather than spend gold which you will only have enough of once reaching level 50 and beyond, these books will allow you to reach 100% riding speed) – Simply a Quality of life that expedites travel times.
- Book of Artisans (Arguably the single most important item within the bundle) – Goes beyond quality of life allowing you to train professions anywhere without having to find different profession trainers. Super huge time save and convenience. Still a convenience.
- 4x 30 slot bags for holding the massive amount of mats you will be harvesting and making. (Second most important part of this bundle and buying them separately gets really expensive.)
- Feather of Ancients Azeroth (Unlocks all flight points making our trips that much easier to complete) – Without it you are looking at long travel times to get to the zones needed for the route.
- Stone of Retreat Faction Capital (It gives you both Horde and Alliance which saves us time going back to the capital to travel from.)
With this purchase you are capable of finishing the guide with some travel reduced but still consuming travel time, most of which will be traveling back to a place to craft and buy crafting mats from vendors. Can’t get everything from harvesting afterall
Minor purchases that follow will add a bit to the DP total, but will ultimately save you a ton of time and effort.
For travel purchases we will look at Stones of retreat for several zones we will visit and spend time.
The ones I managed to collect which were not the entire needed list are the following:
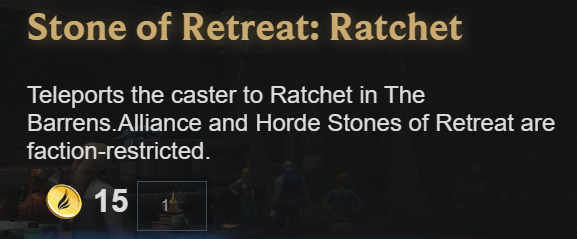
- Stone of Retreat: Ratchet (Barrens) – Nice for traveling between continents and not taking boats. You will also spend some time here Fishing and Herbalism.
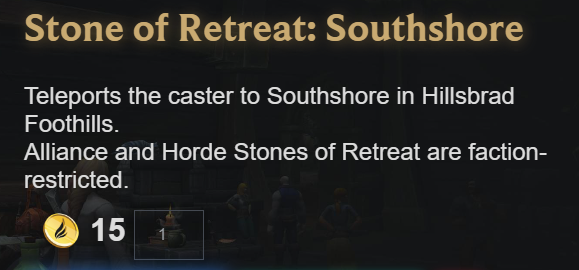
- Stone of Retreat: South Shore (Hillsbrad Foothills) – You will stop here to collect quite a few resources and is a great place to fly from, as several zones around this area are places with important mats.
- Stone of Retreat: Marshall’s Refuge (Un’goro Crater) – Originally my route took me to this zone a lot only for me to no longer need it in the final iteration. (I was just too lazy to fly from Ratchet).
- Stone of Retreat: Light’s Hope (Eastern Plaguelands) – You will be spending nearly 15 levels gathering in this zone if you choose just Herbalism and Alchemy from this guide and it is very convenient to just have a stone here. In my original run I used this stone alongside a hearthstone set to Winterspring. You can do what I did for quick travel time cause Winterspring is where I did all of my crafts and bought mats in my run.
These are the exact stones I used in my routing, however, if you are Richie-rich, hate yourself, or are really bad with money (I’m at least two of these) Then there are some additional Stones I would recommend.
- Stone of Retreat: Thalanaar (Alliance) or Freewind Post(Horde) Thousand Needles – This is a key zone for mining and cannot be overstated enough. If I had to do this again I would get rid of both Ratchet and Marshall refuge for this stone, it is that good.
- Stone of Retreat: Eastvale Logging Camp (Elwynn Forest) – I’m sorry I do not know the horde equivalent, but this stone allows you to travel here to cut wood. Now this is not necessary and is only listed here if you really don’t like travel times between crafts. This stone would really only be used when you reach the end of woodcutting and are spending a lot of time in Winterspring gathering nodes.
- Stone of Retreat: Nethergarde Keep (Blasted lands) – This stone takes you to a place with really nice mining nodes, and allows you fast travel to the swamp of sorrow, this is primarily for alliance as the horde could just use the Stone of Retreat: Stonard (Swamp of Sorrows) Which would be a great replacement for the stone of south shore as that is alliance only, with the ability of getting to undercity being easier than the alliance travel points. Mind you this means a bit of travel time for you but not a lot.
- Stone of Retreat: Everlook (Winterspring) – This stone is critical if you don’t set your hearthstone here while using another stone to an endgame area I.e Light’s hope or the thousand needles location as these three zones will become your best friends. This city allows you access to crafting stations, vendors for all the professions and will allow you to get rested in a nice cozy and small area. Or you could do like I did and just set your stone here on your first visit and just hearth between harvests.
As for the Purchase of the Warchest you will receive a currency called Bazaar tokens 560 in total, that can be spent in game to purchase some of these stones from a merchant (don’t quote me but I believe you should be able to afford 2 of them.)
We are finally approaching the final purchases that I would recommend to your crafting journey and these ones have to do with the crafting process itself.
Should you not buy any Stones using Bazaar tokens, there is instead an option to purchase crafting hats that drastically increase the speed of your crafting – mining, blacksmithing, or engineering for the love of god, if you take these professions get the fucking hats you will hate yourself if you don’t.
Outside of these hats there are two more shop purchases I would recommend.
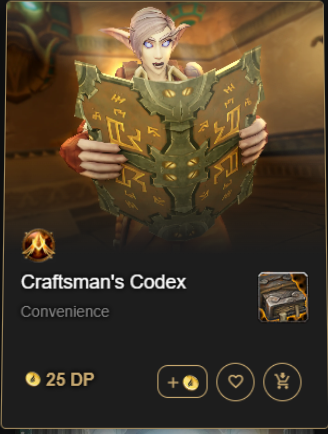
The first is called The Craftsman Codex – This item will allow you to learn additional professions beyond the two primary professions that are standard. They cost 25 DP per, but will significantly boost early game leveling speed.
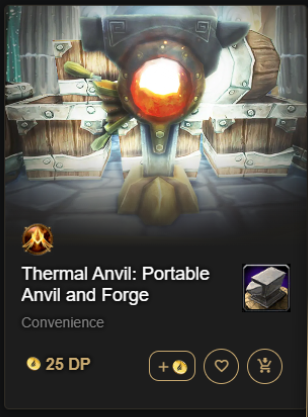
The final recommended purchase (Which mind you isn’t important in the slightest and only helps if you take mining, blacksmithing or Engineering) is an item called Thermal Anvil. This item is simply a quality of life before 55 and will allow you to craft on the road. By no means is it even remotely as important as bag space, crafting codex’s or the Book of Artisans. Even the Stones are more important, especially if you have a stone to one of the Neutral goblin towns.
Other than that the prep work is almost done, with these purchases out of the way and sent to your mailbox, you are going to wait and read this section double checking your work before accepting them.
WARNING: You must start the trial before accepting your mailbox and especially before opening any items from the game store. YOU HAVE BEEN WARNED.
Start the trial by accessing it from the lower right corner of the menu bar. If you don’t know how to do it, then you probably shouldn’t be doing trials yet.
With this out of the way we now move on to the meat of this guide, the routing.
Recipe and Crafting Information –
So we will take this from the beginning and talk about the different professions, their benefits and of course where each of them stop along the way to achieve maximum leveling speed and farming efficiency.
WARNING: Before looking further into this guide I warn you now and it will be the only warning you will get. Should you level any of the professions past the key points mentioned within this guide you will find yourself consuming massive amounts of time leveling, or you’ll reset your professions and have to relevel. Again do not level your professions beyond the points mentioned in this guide.
Hard cap profession level –
Do not level any profession past 300, you will spend no time at all in Outlands.
Herbalism and Alchemy –
The age old combo you will see most individuals take is the Herbalism and Alchemy combo. This is a great one as there are several points where you can stop the build and just spend time gathering mats for huge EXP gains. This guide however will be using a route that does not have a lot of other players spending time within the zones taking your precious resources during critical times. Do not under any circumstances level past 300. You could however stop at 225 and spend your time collecting Goldthorn in Arathi Highlands. The smarter choice is leveling past that to 300 however.
225 Alchemy EXP:
Elixir of Agility unlocked at 185 Alchemy even at green 225 it grants you approx. 1400 EXP per craft without rested EXP double that with.
mat Req.
1 Stranglekelp
1 Goldthorn
1 Leaded Vial

Catseye Elixir unlocked at 200 Alchemy and stays yellow at 225 granting approx. 1100 EXP per craft without rested EXP double with. (This Craft consume are ever important Goldthorn that could be used for Agi. elixir’s instead, only use extra’s if you have run out of Stranglekelp)
Mat Req.
1 Goldthorn
1 Fadeleaf
1 Leaded Vial

Major Troll’s Blood Elixir is a drop from mobs in Desolace (not routed) and pirates from Stranglethorn Vale (Routed for a short period unless you spend your time at 225 Alchemy farming a lot of Goldthorn at which point I would recommend)
Now I did not get this recipe in any of my runs so it has an unknown EXP per craft but I can’t imagine being that far off of the Catseye elixir at the lowest and potentially higher than the Agi. elixir. This recipe is green at 225 so it’s a toss up.
Mat Req.
1 Liferoot
1 Bruiseweed
1 Leaded Vial
300 alchemy EXP:
Purification Potion will be the most important Craft if you do the 300 Alchemy Route, this craft is yellow at 300 granting 1200-1300 EXP approx. without rested exp. The reason we use this craft over the Agi. Elixir is due to no one leveling in Winterspring and Eastern Plagueland. This is due to no one still leveling in the classic zones upon hitting 58.
Mat Req.
2 Plaguebloom
2 Icecap
1 Crystal Vial

While Gathering in the zones you will gather Secondary mats, these are Mountain Silversage, Gromsblood, Golden Sansam, and Dreamfoil. The following crafts will utilize these additional crafts for increased exp gains. Green at 300 this craft grants 600 approx. EXP per unrested. recommended way to spend the Silversage and Golden Sansam
Mat Req.
2 Golden Sansam
1 Mountain Silversage
1 Crystal Vial

This is the alternate Silversage Craft using up a good deal of the Dreamfoil, yellow at 300 it grants 800-900 approx. EXP per craft unrested. The reason this is not the preferred craft is due to the high cost of Dreamfoil and it’s a drop only recipe from overworld chests in Azshara, Western Plaguelands, and burning steppes.
Mat Req.
1 Mountain Silversage
3 Dreamfoil
1 Crystal Vial

If you haven’t collected the next recipe, this will be the preferred Dreamfoil recipe, Green at 300 it grants 580 approx EXP unrested. This of course uses our ever important Plaguebloom, but you will occasionally end up having extra and this is a great recipe. This is purchased from the Zandalar Rep alchemist in STV.
Mat Req.
1 Dreamfoil
2 Plaguebloom
1 Crystal Vial

Now this is a great recipe that will require killing some mobs in Winterspring, you will also need to level enchanting along the way to get yourself the mats to make this recipe. Dropping from Cobalt Mageweavers in the zone, mind you these are elites and I don’t recommend tackling them until you are 60, they will eventually drop this recipe. I don’t know the EXP hour as I didnt get this recipe till I was already done with the challenge as I prepared for another trial. However, it’s cheap and yellow at 300 which is fantastic news.
Mat Req.
1 Dreamfoil
1 Dream Dust
1 Crystal Vial

Another Alternate Craft is the Elixir of Sages, yeah a lot of dreamfoil needed for these damn potions. So it’s still green at 300, granting approx 580 EXP. You will find yourself just using whatever grants the highest EXP per craft as they are all pretty close. You may also not find this as it is a drop recipe from Elites in Eastern Plaguelands.
Mat Req.
1 Dreamfoil
2 Plaguebloom
1 Crystal Vial

Our first Gromsblood craft will be the go to craft as it gives 1100 EXP unrested. However it uses up our Plaguebloom which is better used on the first craft, however, if you have abundant Plaguebloom and Gromsblood it is worth crafting.
Mats Req.
2 Gromsblood
2 Plaguebloom
1 Crystal Vial

The last Craft at 300 will be the Detect Demon Elixir. Green at 300 it grants a whopping 680 approx. EXP per craft unrested. For only 2 Gromsblood as well. Absolutely a wonderful craft, sad news, there aint a lot and the only real zone to get it from is Felwood. You’ll get more Plaguebloom, Dreamfoil and Golden Sansam from the zone though so this is nice icing on the cake too
Mat Req.
2 Gromsblood
1 Crystal Vial
Herbalism –
All EXP approx. are unrested.
If locking Alchemy at 225 stop Herbalism at 150
Goldthorn – Is yellow at 150 granting 500 EXP approx. per node.
Fadeleaf – Is yellow at 150 granting 400 EXP approx. per node.
Liferoot – Is grey at 150 granting nothing.
Bruiseweed – Is grey at 150 granting nothing.
Stranglekelp – Is mega Grey at 150 still granting nothing, put hey its abundant as fuck and grants a good chunk of EXP all the way till grey.
Alchemy at 300, Herbalism at 300.
Now the Database lies and it states that all of them are grey at 300 however I know that all are green at least and orange at most.
Arthas’s Tears – Green at 300 grants 350 EXP approx. per node. (just extra EXP in Felwood and Eastern Plaguelands)
Sungrass – Green at 300 grants 350 EXP approx. per node. (just extra EXP in Felwood and Azshara)
Dreamfoil – Yellow at 300 grants 500 EXP approx. per node.
Plaguebloom – Orange at 300 grants 750 EXP approx. per node.
Gromsblood – Green at 300 Grants 350 EXP approx. per node.
Mountain Silversage – Orange at 300 grants 750 EXP approx. per node.
Icecap – Orange at 300 grants 750 EXP approx. per node.
Golden Sansam – Yellow at 300 grants 500 EXP approx. per node.
Mining –
This is a flexible profession being paired with Blacksmithing and Engineering and is even greater when paired with both which you will understand further within the guide.
If you choose to follow Blacksmithing then you will need to go beyond 150 to 225. This will negate all benefits from gathering the ore, but will allow you to smelt gold to craft them sweet sweet keys.
This will allow you to continue leveling mining if you take additional professions such as Herbalism to benefit from the High EXP nodes of high quality materials if you see fit. Stopping at 225 gives you the ability to mine Truesilver nodes that are orange and grant a hefty EXP per node, and Mithril that is green granting modicum EXP per node but you also get to smelt the Mithril thus double dipping the EXP on the craft. Otherwise just go full 300 and get those Rich Thorium deposits + smelting that give good EXP gains. And hey double dipping gathering professions is always a nice boon.
Blacksmithing –
This has been the profession I found the Greatest EXP per hour in, stopping at 150 when you can craft gold skeleton keys and Iron buckles. You can go beyond this point but will find yourself stalling in EXP gains as there are less nodes for higher level mats.
150 Blacksmithing EXP:

Iron buckle unlocked at 125, ignore the Wowhead image above as it is incorrect even for classic wow. It will be yellow at 150, granting you 440 EXP approx. per craft unrested.
Mat Req.
1 Iron Bar

Golden skeleton key another bad image from Wowhead, learned alongside Iron buckle and yellow at 150. Grants 800 EXP approx. per craft unrested. The limit on these crafts will eventually be the heavy stone needed, not the gold surprisingly. Sells for gold and change with a full stack of 100 keys. Good money making here.
Mat Req.
1 Gold bar
1 Heavy Grinding Stone
I will say this, on my way to 70 on my successful attempt (Yes it took me 3 attempts to complete this trial due to stupid decision making I made in Arathi Highlands and Blasted Lands), I decided at 58 to advance my mining to outland level and soon realized my mistake. 3 Hours later I had managed to relevel both Mining and Blacksmithing to this level. How did I learn that this was the best place to stop? Well routing through Thousand needles showed me huge Per hour mats on Iron and gold, but I also stopped, did some research and found that Alterac Valley had huge gains as well on Iron and Gold. Thus the high output of mats and the decent EXP for crafting recipes that needed only a single ingot was how the route was born. The next Section will show maps and go into further detail about the routes.
Engineering –
Now this section is simply hearsay as I have not pursued this avenue but know of another that was using this method to level and was doing so successfully, as he was 68 when we discussed the benefits of this method.
Stopping at 75 you will be taking advantage of a craft using copper. Specifically the item Rough Boomstick.

Reportedly this craft generates 1600 EXP per rested craft, resulting in a 800 EXP unrested. This is helped alongside another unlock at 50. That will be yellow at 75.

This is then paired with a third craft from engineering That will not help you level but isn’t terrible to craft.

This then takes a crap ton of copper to make this item to get the exp returns. In the routing I will discuss the areas to maximize this farm. One thing of note is it is wonderful to pair alongside Blacksmithing as one of the high iron output zones is also a zone with respectable copper outputs. Which will allow you to supplement the grind in another zone to maximize output.
With this specific profession an option you could do is to unlearn it at the end of each rotation, so that you can relearn it, thus recrafting items that are orange during the craft to maximize the EXP gains this will include crafting one additional item during the process potentially two.
As you relevel you will craft
This will be crafted using Rough Stone from 1 to 30 Engineering. Giving an unknown amount of exp. You will have to calculate how much stone you need to accomplish this each rotation. Yellow crafts almost guarantee a 2 points per craft up to green, so this shouldn’t be a restriction to the strategy.
Then you will do all of your normal bolts, and copper tube crafting which you will also have to balance as the mats are 2:1 Copper for Tube and Bolts respectively. Then with one of both you mass craft the gun. Once you have finished with all of the gun crafts for maximum exp. You will do the final craft which uses Coarse stone that you would get from Iron and tin deposits, to craft the final recipe of the rotation.

Spam this till you are blue in the face and out of mats. Unlearn, then relearn Engineering and start it all again. (I’m sitting here getting ancy to try doing this strategy myself to beat my prior time and push myself up on the leaderboard. Of which I’m not on, because I can’t figure out how to submit the run.)
Leatherworking and Skinning –
Honestly I can tell you this profession is not worth it. Over the course of my three attempts, I took LW and Skinning each time and was disappointed each time by the sheer amount of work needed to make it work and the minor EXP returns. With the need to slaughter enemies just to skin them, then needing ever increasing amounts of mats to make anything worth the time is just not worth it.
Minor EXP gains from skinning beasts as you level will ensure that you are always able to collect a bit of extra EXP as you need to kill some creatures to get to other nodes if you take other professions with Codexs. Otherwise just avoid this profession.
Regarding other primary professions I am unable to speak on or would not recommend.
Enchanting –
I have no experience or research done on this profession so this is all speculative going forward. I will not speak to any of the crafts however Disenchanting items that’s level matches your enchanting grants a decent chunk of EXP, and currently I know of a single craft in this guide that utilizes a single material from enchanting.
Dream Dust – Disenchanted from green items ilvl 50 or higher. This also grants an unknown amount of EXP per craft.
Tailoring –
Just don’t do it. Cloth is farmed via killing creatures of an appropriate level equal to the cloth. Mostly humanoids drop it. There is no cloth farm in the game that a solo player can do with any build until late game that will allow you to get mats fast enough that this is worth it.
You can spend the cloth you do get on first aid for some modicum EXP and prep it for trials after this one. Otherwise, just leave Tailoring alone as it is not worth your time.
Jewelcrafting –
As you mine you will occasionally find the gems needed to craft with, however this is not the only thing holding back JC from being viable. As you level it the mats get more and more exotic to the point that you will spend too long farming just to craft simple items. Now this isn’t to say you can’t do something similar to Engineering and unlearn and relearn the profession to craft the beginner items. This is held back by needing to use the same copper for engineering on JC instead. I don’t know the EXP returns on JC, I assume that it is just better to do Engineering.
Secondary Professions –
Secondary professions have no limits to the amount you can learn. They are a source of additional EXP gains as you level. Some are needed for the route for some of the resources you can gather from them, and getting brief boosts to EXP that speed up the early levels. Eventually in the route I will have you drop most if not all professions in favor of just a single one. But I’ll briefly cover these professions here and talk about the benefits.
First aid –
If you manage to collect enough linen to progress to wool, for my route you will most likely get stuck at this point unless you spend a good chunk of time farming to get past this point. Easier to do around level 30. If you do manage to get past wool and into Silk, it’ll be fairly easy to keep it up to mageweave before it is no longer viable. Some okay EXP however it isn’t truly worth investing in ever during this guide.
Fishing –
This profession will see quite a bit of use as you level but will become obsolete by about 225 as the areas are no longer worth fishing in. mind you if you manage to get the fishing journal to see pools then you can just keep that going as you follow the route stopping to fish to earn some EXP. The route discussed here will only have you earning enough fishing to help important recipes at key points.
Cooking –
At the start the EXP earned is amazing for crafting basic goods, these then evolve to some decent recipes such as turtle bisque, Sagefish and Clamlette surprise. After this it is no longer worth fishing or cooking and will be left at the wayside.
Woodcutting –
This profession will follow you all the way. Even when trees are green the grant 300+ approx. EXP per node. Then when you hit 300 and enter Winterspring, the trees will be yellow granting near 500 EXP unrested per node, and you will still get EXP from processing the wood into planks. My go to rotation is two trips around Winterspring then before going to my next zone I would go to the sawmill and process the wood. Well worth the time it takes to chop the trees.
Routing and Zones –
Finally you have made it to the section with pertinent info. About at what levels you will be tackling which area’s along with maps that will assist you in harvesting what mats you will need to progress from level 1 to 70. Each section will cover level ranges and may include multiple zones, maps, and crafting.
Starting –
At the start of your run you will need to decide what profession you have chosen. For this guide I will explain each of the following professions for each zone.
Herbalism (Thus Alchemy)
Mining
Black Smithing / Engineering
Fishing
Cooking
Woodcutting
I will also recommend where to stop for maximum earning potential and will explain the benefits of all.
Level 1 – 10
Starting Zone:
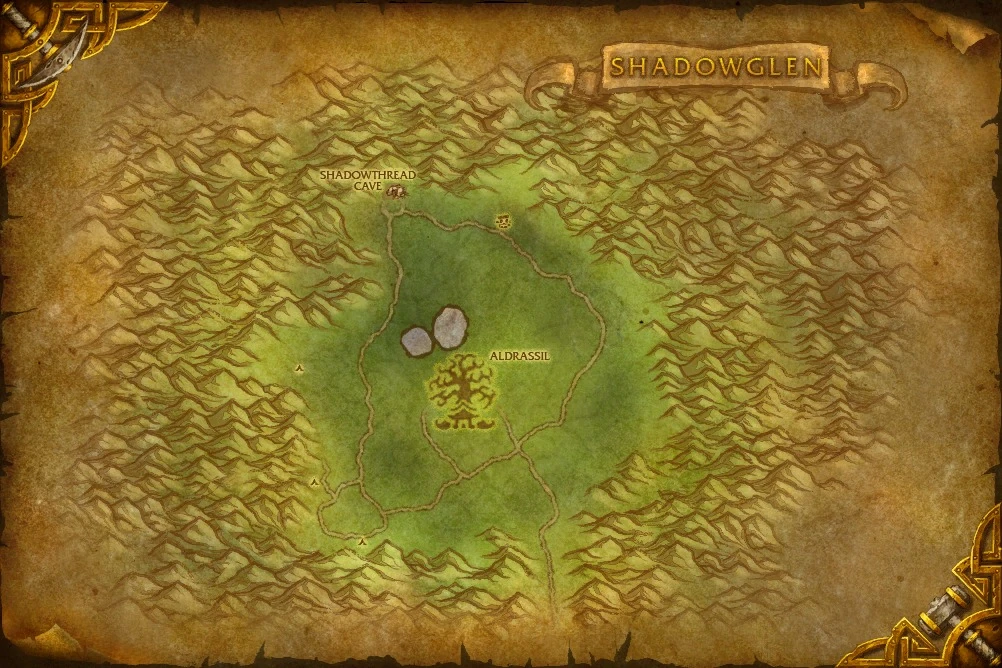
Assuming you are playing Night Elf is what I will do for everything going forward. Mind you the starting zones will all play the same and you will do the same thing for every race.
At level one grab your professions and start your trial, you will proceed to level Mining, Herbalism and wood cutting to 50 or as close to 50 as you can. You will want to hit level 10 at least before leaving, getting Herbalism to 50 minimum.
The mats you will collect in this zone will be:
- Copper Ore
- Rough Stone
- Peacebloom
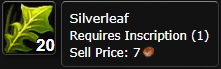
- Silverleaf
- Greenwood Log
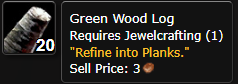
Keep all of these mats as you progress, Logs can be made into wood planks and sell for more per plank than the materials needed to craft them. Early money goes a long way.
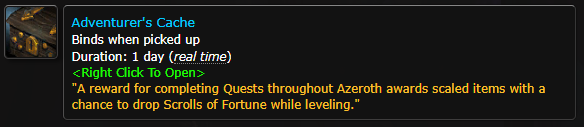
During your stint in the starting zone, complete as many quests as possible with Adventure Caches; these will grant okay gear as you level and will sometimes give you gear that is worth a pretty penny.
As for your route, Turn on the Find Herb and Find Minerals found on page 1 or 2 of the general tab in your spell book.


Then travel around the outside of the area in a clockwise or counter-clockwise rotation.
If you are in a zone that has wolves or boar keep any meat from them for cooking later.
Mining: 1-50
Herbalism: 1-50
Woodcutting: 1-50
Level 10-15: Elwynn Forest or Durotar
This will be the last true faction restricted zone before you travel to other areas to collect materials.
Using your Stone of Retreat: Capitol City, or manually traveling to the city, travel to Stormwind or Orgrimmar.
Fishing: 1-50
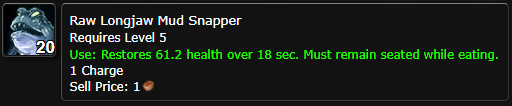
First things first set your Hearthstone here just in case. Then head to the area where the fishing trainer sits. We will be fishing from 1-50 or until we have 2 stacks of Longjaw Mudsnapper,
which may inadvertently give you Brilliant fish

& Bristle Whisker Catfish.
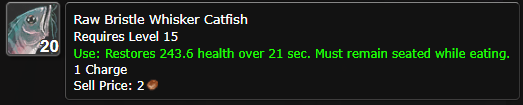
If you manage to get a full stack of Brilliant Fish keep them, if not sell what you get. You will want to keep all of the Catfish.
Before leaving the vendor, buy Bristle Whisker Catfish Recipe from the vendor for 12 silver, A better fishing pole.
Find a general trade goods seller and buy yourself 200 Vials (If you chose Alchemy) and 200 Weak Flux (If you chose Blacksmithing or Engineering). Leave out the south gate, heading to the starting town Goldshire for Elwynn Forest or the Durotar Equivalent.
Upon arrival talk to the Artisan book and purchase cooking supplies 30 Simple Flour, 30 Mild Spices
Cooking: 1-50 (140~)
Learn: Spice Bread
Make the bread until it is grey. If you need to buy extra mats then do so as the chances of a level at random once green.
Learn: Charred Wolf Meat
If you have enough wolf meat you can level to 50 this way.
Learn: Spiced Wolf Meat
Or you can use this recipe till 70.
If you are at 50 cooking, Buy the Mud Snapper recipe from the artisan book and learn it.
If you can make the full two stacks of Snapper this will get you about 90~ or 100 cooking to learn the Bristle Whisker Catfish Recipe, however for this guide to work you need at least 75 cooking before you leave the zone.
You can then Craft as much Catfish as you can, getting roughly 140~ cooking.
This will be the biggest boost to a profession and you can possibly juggle cooking between rotations of Elwynn forest or Durotar by unlearning and relearning. You could buy extra recipes or just use the base recipes recommended above.
Mining: 50-75
At this point stop and craft your ore into Copper.
Alchemy: 1-50
Then set it aside, then craft whatever alchemy recipes are orange and you have the mats to craft, usually a Ton of minor Healing potions.

Mat Red.
1 Peacebloom
1 Silverleaf
1 Vial
Make this as you can and until green. And until you hit 50. Use whatever other recipes you need to without using your Earthroot to level.
Learn: Elixir of Minor Fortitude
Learn: Lesser Healing Potion
Herbalism: 50-80~
We will still want to collect as many Nodes as possible prioritizing Earthroot as we approach 75.
Engineering / Blacksmithing: 1-75
If you are planning on doing both then you want to prioritize Blacksmithing over Engineering here. The reason is you want to push towards Iron as quickly as possible. You could always spend longer in this zone to ensure that both are leveled.
Blacksmithing recipes:
1-25
Craft Copper bracers to unlock the next recipe.
Mat Req.
2 Copper Bar
25-50
Use Rough Stones to craft Rough Grinding Stone, you always want to prioritize crafting Grinding stones when they are Orange and Yellow These give alright EXP but are required for a good amount of recipes.

Mat Req.
2 Rough Stone
50-75
Rough Copper Belt
This is the cheaper recipe to help level Blacksmithing.

Mat Req.
6 Copper Bar
Route: Elwynn Forest
Before leaving Goldshire, grab quests for the Kobold mines, Gold dust, and candles. These are nice to do as you will be in the areas anyways and can earn some Adventure Caches while you go.
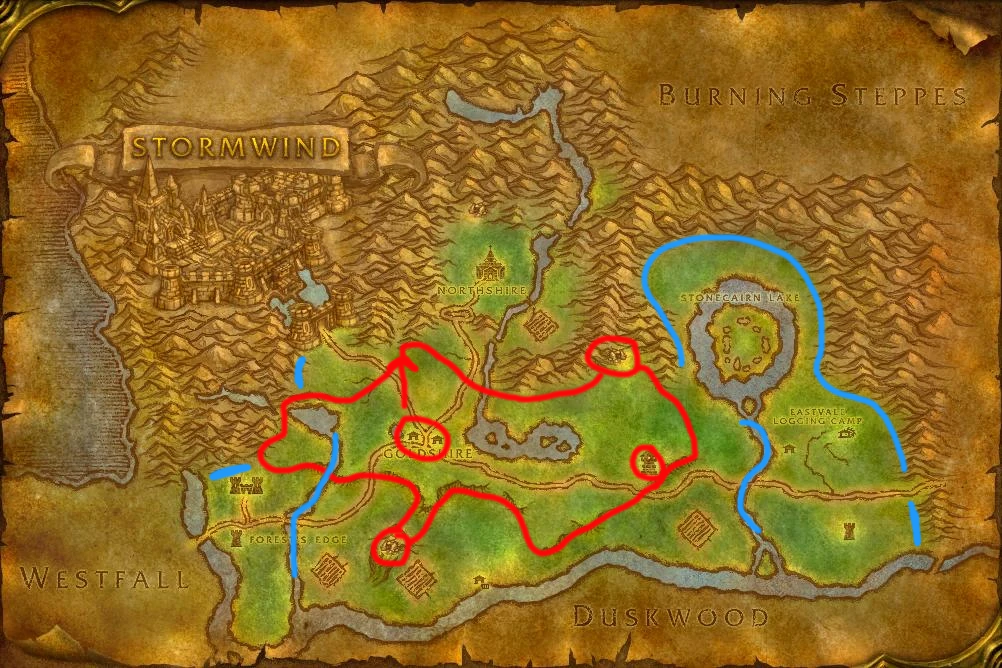
Head north out of Goldshire, then follow the mountains but not on the mountains so you can still see herbs that spawn between the trees of the zone. The first cave along the route is a kobold cave with several copper nodes and a single tin node, if your build is capable of handling it, and I would take the cautious route till you are comfortable with the build.
The Red route is the primary route where you will find Copper, Peacebloom, Silverleaf, and Earthroot.
The Blue route is alternate areas where Ore and herbs can spawn.
After the first cave, there is a wizards tower that will give 2 quests Murloc spittle and depleted Mana stones, both of which are easy quests with Adventure Caches. These quests happen in Stone Cairn Lake.
Follow the Hills and ledges until you get to the other kobold cave where you will either tackle the Goldshire quests, or finish them. Head on out and finish the rotation. Between each rotation to allow respawns of materials, spend some time crafting. Till you hit the levels noted here. Your level doesn’t really matter yet as you will not be going anywhere dangerous.
For horde, if you are playing a race of that faction go to Undercity and use https://classic.goldgoblin.net/en/farmguides/ To follow their guide and routing for Copper, Peacebloom, and Silverleaf.
During these rotations, which should take you about 3 to successfully get your professions to the point needed.
Woodcutting: 50-100
You will continue to chop trees until you hit 100 Woodcutting earning no EXP from crafting planks. You won’t touch this again until Hillsbrad, but remember to make the planks anyway. It’s extra cash.
Notes: if you are doing just Blacksmithing or Engineering you are about to spend a lot of time in this Zone, instead of level 15 you will not leave until level ~20-25 I would recommend pushing till 22 at least this will allow you to travel to the next zone earlier than intended but not too under leveled for this to matter. Should you feel unsafe in this act or you are only doing Engineering then you may stay till 25.
If you are getting good returns on copper then you may stay here for the entirety of your leveling experience with Engineering.
One other tip, if you stay in Elwynn Forest till 25 or indefinitely, then unlearn Woodcutting and relearn it every time you no longer get experience chopping trees. This Route will Diverge for the next 15~ levels as Herbalism will be the next focus.
Level 15-25~: Ratchet or Darkshore
Be prepared for some travel if you do not have the Stone of Retreat for either of these zones. When it comes to deciding what you want to do, it depends on what your Herbalism is at this time. If it is at 80 then you should go to Ratchet, there is greater density of the plant with good pools of junk to fish in for the Fish tracking journal. To be honest you will probably end up visiting both. So start with Ratchet and fly as needed to Darkshore.
Fishing: 50-100
The goal here is to fish in the Salvage pools, and the Oily Blackmouth. In between fishing dry the pools in Ratchet you head south along the shore grabbing all the pools along the way. You will need to get as much Oily Blackmouth as possible.
Barrens Route:
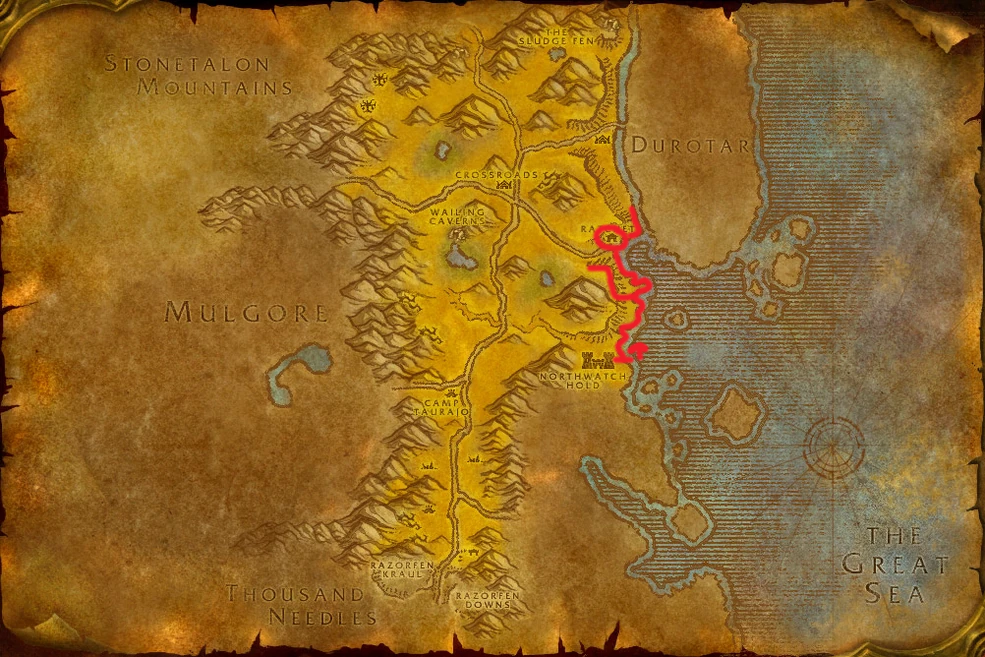
Simply fish off the pier then head south, pass through the pirate camp and head up the hill to the cliff side where you will grab a bunch of Earthroot and Briarthorn. Return to the shore and head south avoiding mobs and grab all herb, ore and fishing nodes along the way. Once you get to Stormwatch Hold, swim out to the water and kill the crabs on your way back.
Remember to keep all clams and Crab claws you get along the way. Once back in Ratchet we can craft. Do this rotation until you have the book and a decent chunk of Stranglekelp.
Herbalism: 75-125
- Earthroot will get you high enough to harvest Briarthorn and Stranglekelp and still has its uses.
- Briarthorn Needed to craft lesser healing potions and level Alchemy
Stranglekelp Needed to craft Swim Speed and Water Breathing, which you will end up prioritizing Water breathing due to ease of access for Stranglekelp.
Alchemy: 50-90~
This is going to be one of the larger sections of Alchemy as this is the dedicated section to just alchemy to push for the mid level crafting zones.
Level alchemy until you unlock Black Mouth Oil at 80. This can be done using both
Minor Fortitude:
Mats Req.
2 Earthroot
1 Peacebloom
1 Vial
Lesser Healing Potion:
Mats Req.
1 Minor Healing Potion
1 Briarthorn
Blackmouth Oil:
Mats Req.
2 Oily Blackmouth
Once you cap out Oily Blackmouth at 90 Alchemy you can leave for Darkshore cause you will need more Oily Blackmouth, Mageroyal, Briarthorn, and Stranglekelp.
Darkshore Route:
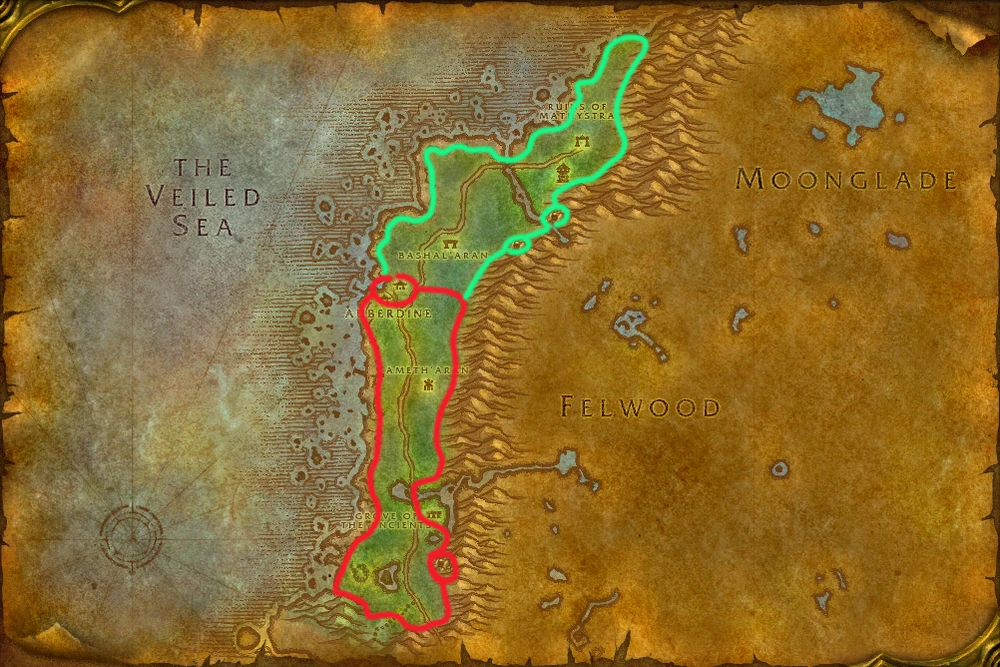
As for the Route in Darkshore, if you are Horde just avoid Auberdine otherwise follow the red line along the coast. Be sure as you follow the coast that you walk between the sand and the tree line as you are looking for both the coastal resources and the forest resources.
Be sure along the route to grab any ore nodes you see. There is a cave along the route that I did not personally use, but is available if your build can tackle it for extra resources.
As for the Green Route, it is an optional addition with two more caves, it will drastically increase your time spent running and you may end up with full bags if you are looting your kills. This addition is purely to allow you to harvest more Ore than anything else as the map is so large you will be able to follow the red route and everything being respawned for you when you return to Auberdine. Craft, sell and check your progress. You will do this rotation 2 times, possibly 3.
Herbs:
- Mageroyal
- Briarthorn
- Stranglekelp
Alchemy: 90-150
Now that you have access to more resources it’s time to make Water Breathing Elixir and Wisdom Elixirs as needed until 120.
Water Breathing:
Mats Req.
1 Stranglekelp
2 Blackmouth Oil
1 Vial
Elixir of Wisdom:
Mats Req.
1 Mageroyal
2 Briarthorn
1 Vial
Alternate Recipe to advance would be the
Swim Speed:
Mats Req.
1 Swift Thistle
1 Blackmouth Oil
1 Vial
At 120 you will unlock
Lesser Mana Potion:
These grant really good experience alongside the other stranglekelp recipes in the 1k+ range without rested. You will fly through these levels.
Mats Req.
1 Mageroyal
1 Stranglekelp
1 Vial
From 120 to 150 you will make these Potions.
When you decide to leave this area you should be level ~20-25, as the next zone will be 25+ if you feel your build is not ready or you want to play safe, find other means to level until that point. If you are not doing Blacksmithing, Mining, or Engineering, skip down to the Hillsbrad Foothills section of this guide.
Level 22-27: Thousand Needles
This section of this guide will show you the route for the Blacksmithing, Mining and Engineering where you prevent your build from advancing past 150 and 75 respectively. Remember that your mining should be at least 225 to take advantage of the gold you will find along the route. Beyond this point this section is very straight forward.
Route Map:
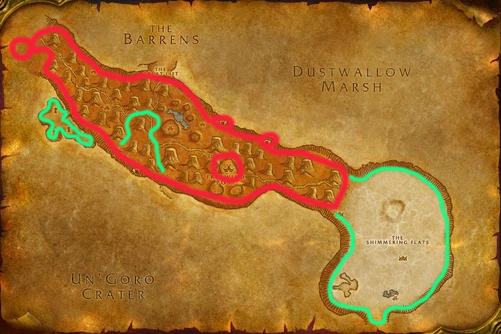
So this map contains two separate sections to the same route. The lower leveled section which will be for Under level 35, and the other for 35+.
Until you are 35 follow only the red section of the map, the green sections contain mobs higher levels and will catch unsuspecting builds wanting. YOU WILL DIE if you don’t take this warning seriously. I did not die here, but once I saw the wyverns on the ridge I left for another day.
Once you are comfortable tackling 35+ then feel free to follow the green paths for even more iron.
Mining: 75-225
So when you first arrive you will only be able to mine copper and Tin, and you will be missing out on the great amounts of Iron and Gold in this zone. Do not fret this is okay. Take your time, we still need to level Blacksmithing through bronze anyways so we have time.
Nodes of Import:
- Copper – Usually interspersed throughout the route.
- Tin Ore – Usually Interspersed Throughout the route
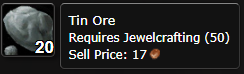
- Silver Ore – Very rare along route, takes the place of Tin Ore
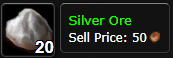
- Iron Ore – Very common along route and will be the major harvest along the way.
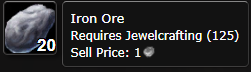
- Gold Ore – Fairly common along route, my thoughts are the server is just a snapshot of a real game and the nodes are all predetermined as you will always see the same resources in the same nodes.
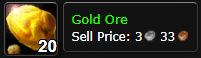
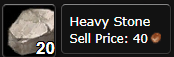
- Heavy Stone – Mined from Iron occasionally and Gold primarily.
This should be the end of the road for just Blacksmithing and Engineering professions so have fun bouncing between Elwynn Forest and Thousand Needles for the next 50 levels or so. Should be a breeze with Rested EXP and proper attention to which phase of the game you are in.
Bronze bars are a combination of Tin and Copper, once you make it past the copper stage of Blacksmithing just autocraft all tin and copper into bronze. Unless you are also Engineering. You will need copper for your crafts.
Blacksmithing: 75-150
One thing you should note before beginning this section, if you reach 150 before you reach level 30 or 35 at which any profession capped out will be auto leveled to the next tier for you no cost, this will fuck you up. If this happens you will level past gold and iron and will have to relevel Blacksmithing from the start. If you are a solo Professions, I am sorry you will have to do this. If you are not then you want to stop at 125 and wait till level 35 before continuing, see the next section for further Alchemy or go back to engineering for a few levels.
Coarse Grinding Stone will be the next craft taking you to 90.
Mats Req.
2 Coarse Stone
You will unlock Rough Bronze Boots make them until Silver Keys at 100, if you don’t have a lot of silver you can continue to make them until Rough Bronze Leggings at 105
Mats Req.
6 Bronze Bars
6 Rough Grinding Stone
Silver Skeleton Key – as mats allow.
Mats Req.
1 Silver Bar
1 Rough Grinding Stone
Rough Bronze Leggings – This or the keys will help you grind to the next level which is Rough Bronze Shoulders at 110. Either of the crafts may take you to 150 depending on available resources so you could just grind.
Mats Req.
6 Bronze Bars
Rough Bronze Shoulders
Mats Req.
5 Bronze Bars
1 Coarse Grinding Stone
Once you are 150 you will spend the rest of the time Making both Iron Buckles and Gold Skeleton Keys.
If you are doing multiple professions there will be an endgame rotation from level 48 that will involve stopping briefly here doing one rotation around the zone for iron and gold, or copper before heading off to another zone to harvest.
Don’t let this stop you from coming back as you please between other zones if you find leveling speed slowing down.
Some additional resources to grab as you are leveling other professions will be some Herbs.
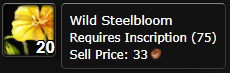
- Steelbloom
- Bruiseweed
These will help with the next section of Alchemy and of Course Boost Herbalism.
Levels 22-27, or levels 27-33: Hillsbrad Foothills –
One thing to note at the start of this section is that this guide will primarily follow my own routing through the remainder of the sections. I entered here at level 25~ spend my time until 30 before leaving for the next section.
This guide is not a hard set path and you may find yourself at a high lower level depending on competition, rested EXP rates and the like. From here you will see the end of all but Woodcutting as a secondary Profession outside niche cases. You want to be level 27 or 28 and grab the Turtle Bisque Quest before moving on, in addition you want to use the recipe to gain a bit of EXP before leaving.
Route Map:
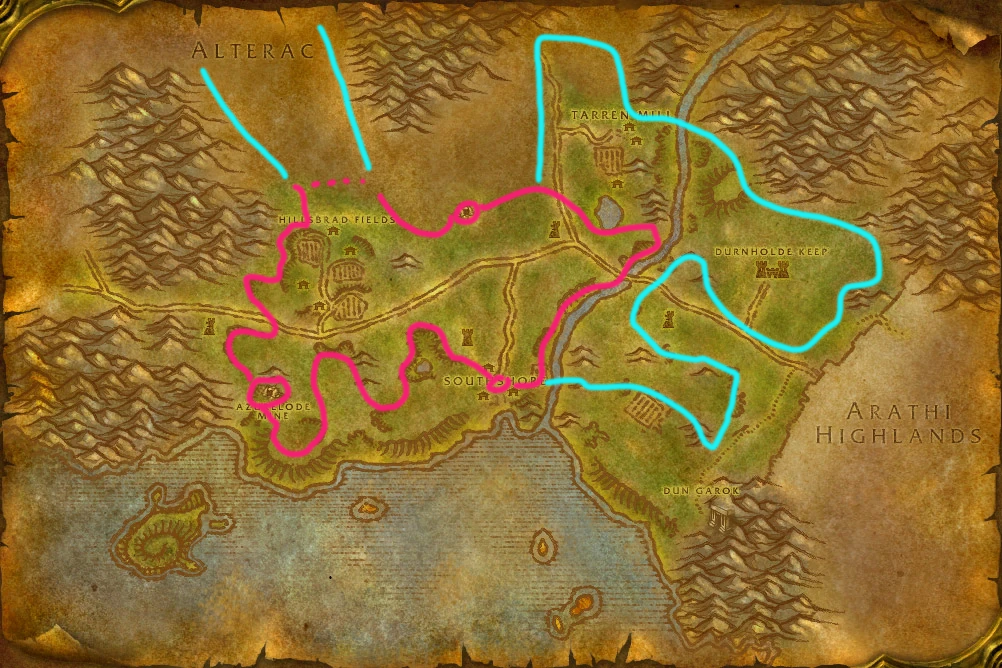
This map doesn’t show the optional valley of Alterac Valley that passes the crater of Dalaran. By level 25, you are capable of following the alternate route that is after this section. Do note that the first cave as you head west from South Shore is a safe cave for Alliance allowing good ore gathering. Be sure to stop along the way for all Nodes you see as all of the herbs and ore can be used. Be sure to Avoid Tarren Mill if you are an alliance, and South Shore if you are horde.
Second Route:
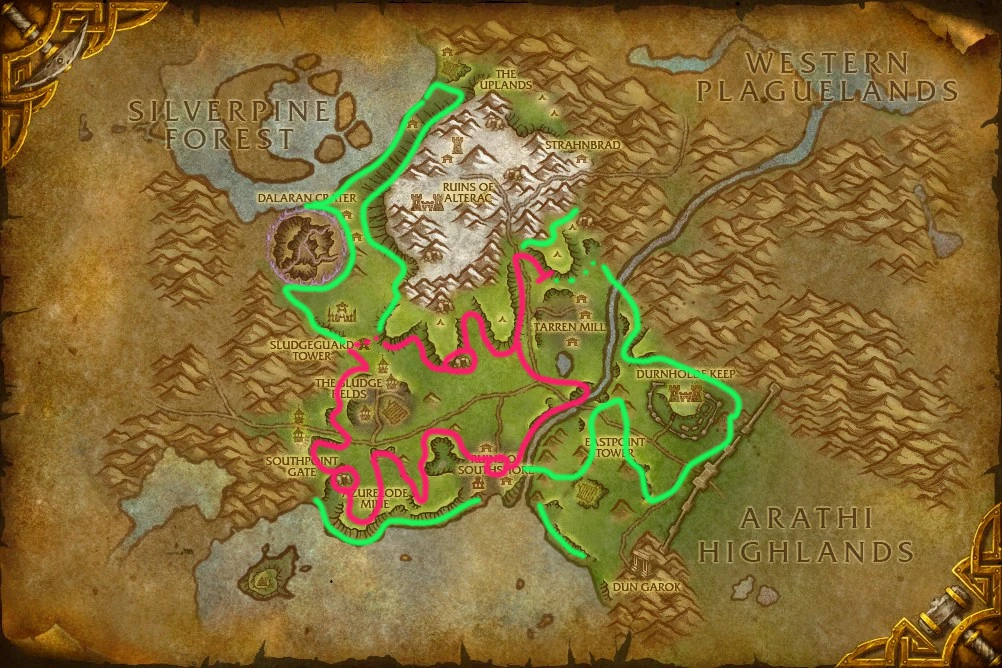
This Route map is from Cata, so ignore the names and the shifted perspective. This shows the Alterac valley outside of the mountains as we are not ready to head up there quite yet. Soon, but not yet.
Along this Route we will work on improving our herbalism.
Herbalism: ~125 – ~175
As you can tell we are now working in approximations of skill level, this will be the case as there are some hard numbers that you have to set before you leave the zone, but you may be able to climb higher as you are here.
The herbs in question for this zone will be the following.
- Steelbloom – This is a common herb node
- Kingsblood – Uncommon herb node but get more abundant as you go north in the zone need 125 Herbalism
- Bruiseweed – Found along the Crater of Dalaran in bunches of 3 or more.
- Fadeleaf – Interspersed along the cliff edges and pushing into the Alterac valley higher level Zones.
- Khadgar’s Whiskers – Along the cliffs edges of the Alterac Valley, you won’t be collecting these here at lower levels need 175 herbalism.
- Liferoot – Along the lakes edge in the northern Alterac Valley.
Your goal will be to just keep collecting Herbs every rotation.
Alchemy: 150 – 175
Realistically you will hit a wall here that will prevent you from moving forward so I will list the crafts you will work on from here on out and move on as your levels allow.
Unlocked at 130 is the Elixir of Defense and can be used to level to 150 if you didn’t get that high before coming to this zone. You should still have a ton of strangle kelp.

Mats Req.
1 Steelbloom
1 Stranglekelp
1 Leaded Vial
Your next unlocked recipe will be the one that grants the greatest EXP output, the Lesser Agi Elixir. This requires Swift Thistle which is a secondary herb gathered randomly from other herb nodes. This could take you all the way to 175 and beyond if lucky. You aren’t that lucky but who knows.

Mats Req.
1 Steelbloom
1 Swift Thistle
1 Leaded Vial
Another Alternative at this point could be the Strong Troll’s Blood Elixir, which is unlocked at 125. This will be used if you have Briarthorn leftover.

Mats Req.
2 Bruiseweed
2 Briarthorn
1 Leaded Vial
Moving up the line unlocked at 150 is the Ogre’s Strength Elixir if you manage to have it drop for you, found in messages in a bottle and Ornate Bronze lock boxs if you chose to learn how to pick locks. It can be found in overworld chests and drop from troll mobs in the barrens, harpies from Stonetalon mountains, and Elites from Stonetalon. Otherwise skip this and make what you can until the next recipe.

Mats Req.
1 Earthroot
1 Kingsblood
1 Leaded Vial
At 155 you unlock the Greater Healing Potion which will take you home to 175. Using both Liferoot which is abundant in the northern shores of Alterac Valley and Kingsblood that is pretty common in northern Hillsbrad.

Mats Req.
1 Liferoot
1 Kingsblood
1 Leaded Vial
A high EXP Potion that can be crafted using Kingsblood unlocks at 160 the Mana potion.

Mats Req.
1 Stranglekelp
1 Kingsblood
1 Leaded Vial
Yet another Alternative based on Mats is the Lesser Invis Potion. This unlocks at 165 and can also be a good craft, but not a high EXP return.

Mats Req.
1 Fadeleaf
1 Steelbloom
1 Leaded Vial
Woodcutting: 100 – 150
As you explore and gather in Hillsbrad, you will be chopping any and all trees you see to collect softwood. This will help boost a little bit of EXP, and allow you to line up your next major Zone.
Fishing: 100-150~
We are fishing up Sagefish, Whisker catfish, Greater Sagefish, and lastly Turtles for their succulent meat and clams.
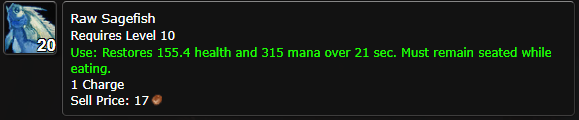
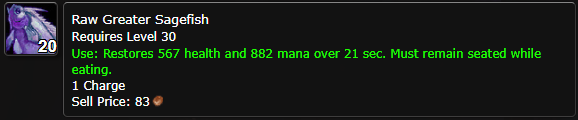
Both will have pools to fish from. One from the river close to Southshore and Tarren Mill, the other from the lake shores in Alterac Valley. These will be needed for cooking.
Cooking ~75 – 225
So this is where a large bulk of the fishing comes in. If you were unable to get fishing up to the Catfish recipe you will make Longjaw snapper until 75 at least before this section. The next recipe that you could use would be the Sagefish recipe.
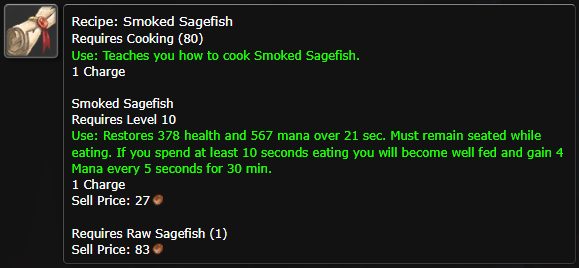
This recipe will get you the rest of the way to 100 cooking to start the Catfish Recipe, this recipe is sold by a merchant in South Shore.
Another Alternative that you unlock at 85 is the Crab claw recipe which is why the guide calls for you to keep any you get.

Mats Req.
1 Crab Claw
Once you start the Catfish cooking you will need a ton of fish, nearly 3 stacks of the things before your cooking will be high enough to do the Greater Sagefish recipe and the turtle bisque.
A recipe along the way that may help is Deviled Clams unlocked at 125.

Mats Req.
Tangy Clam Meat.
So we have those recipes out of the way, you will need to farm at least 10 turtle meat if not several stacks from the turtles in Alterac Valley, the clams they drop have a decent chance at tangy clam meat so you will have that allowance there. WARNING you cannot escape the Catfish as they are still faster to collect than the clam meat. Just fish in poolless waters next to Southshore and you can fish them up with almost every cast.
At 140 cooking you will be able to cook both:
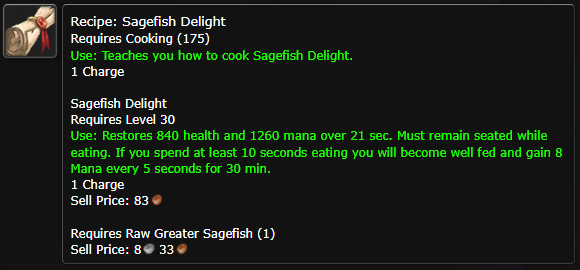

Mats Req.
1 Turtle Meat
Both Recipes take you to 225. So have fun cooking.
Other resources Gathered in this Zone include:
Copper Ore
Tin Ore
Silver Ore
Now that you are Level ~30 – ~33 it is time to choose where you will go. There are really only two places you will go, Arathi Highlands or Stranglethorn Vale. Most of my time was spent in Arathi Highlands, but I definitely used STV to my advantage.
Levels: ~30 – 42
So this is now the Section of the Guide that becomes Rigidly Flexible, you will have multiple zones to choose from and may even end up exploring all of them before you reach 42, this is due to the fact that 42 is the first truly hard limit on level before entering zones that are level 45+ which there are 2.
Let’s not get ahead of ourselves quite yet. Instead let’s break this section down. No longer will I be setting profession levels before leaving zones, instead there is a hard requirement before leaving this section.
This will instead be a section that covers multiple zones, the mats from the zones and the crafts we will be using to level.
Herbalism and Alchemy must be 250, this will catapult us into the late game portion of this guide, you will spend quite some time at 225 as you earn levels to advance. Do not under any circumstance manually advance these two professions
Wood cutting must be 225 so that when we leave these zones we will still be able to chop them down for EXP.
Engineering, Blacksmithing, and Mining have already been covered. Should you reach the Profession limit of the other professions before level 42, then head back to the farming zones for ore and grind these periods out with the huge EXP gains from these professions.
The Zones we will discuss are as follows:
Arathi Highlands to enter this zone you want to be at least 30.
Stranglethorn Vale at least 30 realistically you want to be 35 as most mobs start at this level in the areas we want to visit to Harvest the ever important Goldthorn
Swamp of Sorrows level 32 to enter this zone.
Alterac Mountain: Outer Ring – Level 35+ to enter
What does this mean, depending on your routing, competition, luck, or overall Rested EXP, you may end up being high enough to enter all 4 zones. So let’s break them down here and show you the Crafts that you will be doing.
Zone 1: Arathi highlands.
This is the first zone I died in in my first attempt at this challenge. Level 35 and 17 hours into the attempt I got too close to the horde settlement, and took a one shot arrow to the back of the head. On the route map I will tell you to get pretty close to this same town, but I will emphasize where you cannot go, this will help prevent you from getting got.
Route:
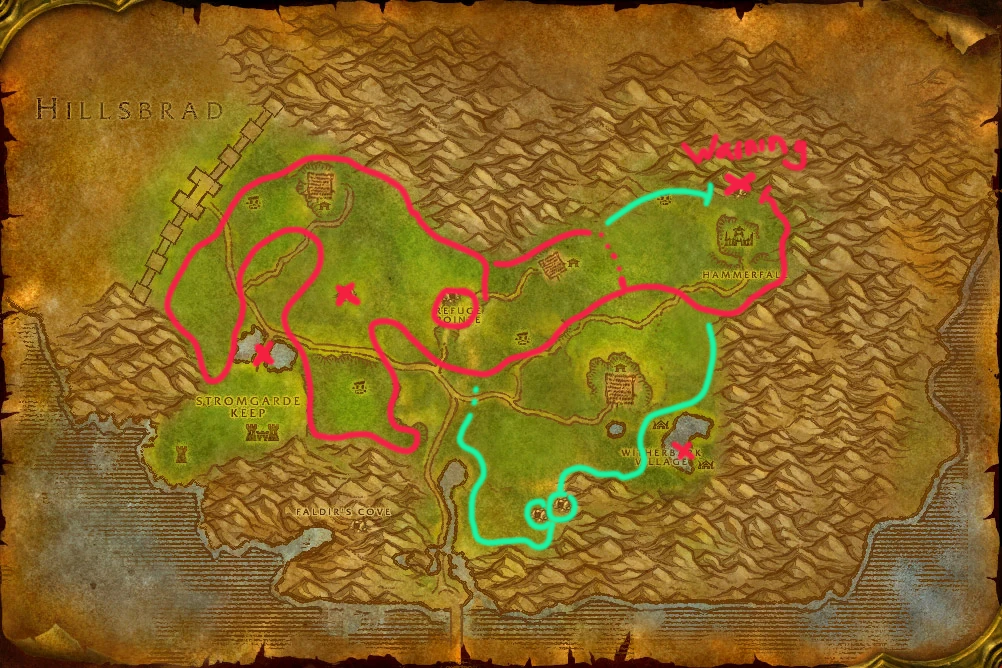
So Starting at the Alliance Camp head north then west. Following this guide closely, I have spent quite a bit of time farming here to know where the Herbs that are important spawn. All around the Defias camp is Tin, Iron, Goldthorn, Steelbloom, Fadeleaf, and khadgars’.
Along the south portion of the western wall between zones is a copse of trees, within that copse is a bunch of Khadgar’s Whiskers. As you travel the zone stay close to ridges and hills and random bushes on hills, these almost always contain a useful herb.
In the North Eastern corner is the Horde settlement. Follow the road to the south until you reach the mountains, then follow the mountains into the pocket behind the settlement. You will find a bunch of Kobold, Goldthorn, Iron, and Mithril, Including some random other Herbs. As you approach the end of that area you will see a cave, that is the hordes cave. It will be covered in Goldthorn, and I mean it, like 5 Nodes at times. You will ignore these if you are an alliance, you will die, there are no if ands or buts about it. The amount of times I got aggro and had to run using Feign death and Shadowmeld to escape is too many. Do not think it’s as simple as that. Pulling one wrong orc once is all it takes to send you back to the start.
There are a few other areas marked as danger zones, you can choose to enter these zones, however be prepared to fight like hell just to progress.
The green marked zones are areas I chose not to explore but are sure to have additional resources.
Nodes that are important here.
- Goldthorn – It is the single most important resource and is the reason we are even in this zone.
- Fadeleaf – It is a nice supplemental craft
- Steelbloom – It is a nice supplemental craft
- Khadgar’s Whiskers – Grab all you can when you can, they will assist when you get to Swamp of Sorrows.
- Iron Ore – Sparse supplemental area for you to earn additional resources.
- Mithril Ore – If you have 225 mining then this is a nice source of additional EXP.
- Tin Ore – If you haven’t pushed through the bronze phase of Blacksmithing yet, stop and grab the few that are here.
Zone 2: Stranglethorn Vale
This zone can be scary, my suggestion is to approach from the north and ignore all of the southern region of the zone as its levels begin to climb rapidly upwards.
Route:
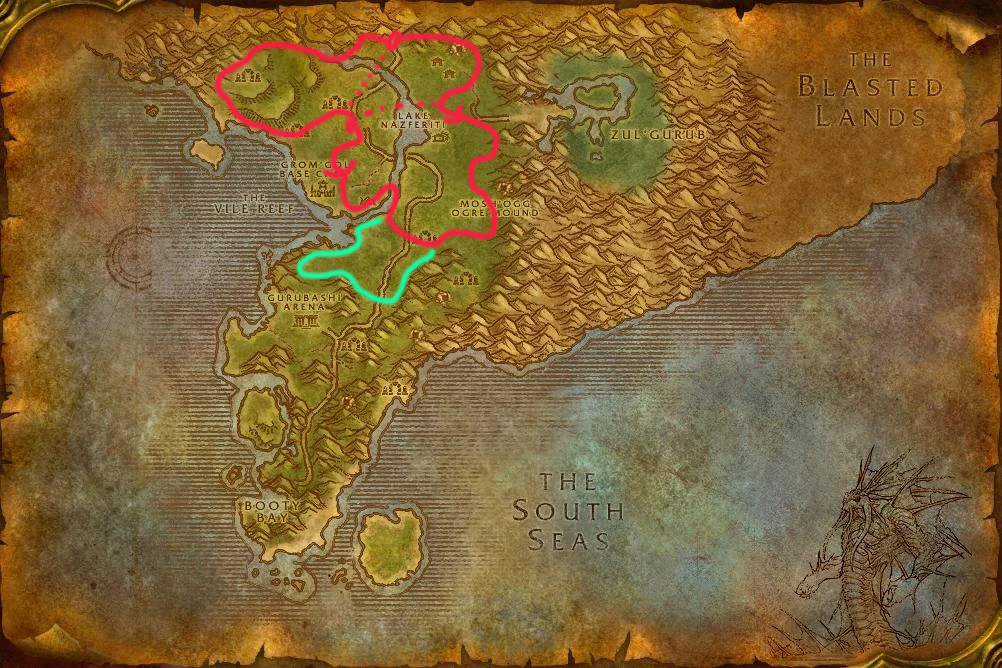
Starting in the north head either East or west, this is your preference. If you plan on avoiding the hills and plateau to the West, I would recommend using the alternate route South and then across the lake. If you head east avoid the lake entirely it will screw up your pathing.
This route is one designed for Whiskers, yet I found it more useful than the goldthorn one in the same zone, and ended up finding more this way. Around the Troll areas and the gorilla elites and Ogres you will find a ton of Goldthorn just be aware of your aggro and always play safe till you can kill them in groups.
There are no true danger zones as long as you are minimum 35 in the northern reaches of the zone.
Nodes you will find in this zone are as follows:
- Goldthorn – It is the single most important resource and is the reason we are even in this zone.
- Fadeleaf – It is a nice supplemental craft
- Steelbloom – It is a nice supplemental craft
- Khadgar’s Whiskers – Grab all you can when you can, they will assist when you get to Swamp of Sorrows.
- Iron Ore – Sparse supplemental area for you to earn additional resources.
- Mithril Ore – If you have 225 mining then this is a nice source of additional EXP.
- Purple Lotus – Found around the ruin structures of the trolls Never did find a use for these, but hey experience is experience.
- Seasoned Wood Trees – get them while you are here you need 175 to chop roots in the next zone, and those give better EXP per node.
Zone 3: Swamp of Sorrows
So this zone is the second most dangerous, and no I did not structure it purposely this way its just how it works out based on levels.
This zone is a bunch of islands amongst the swamp and on those islands almost randomly are the herbs we are looking for. So you will probably just diverge from the route only to return to it sporadically.
As a side tangent. If you are an alliance the only means outside of a Stone of retreat to get here is to fly to the blasted lands and head south. Based on the area in the northernmost section of the zone you will find that the creatures are easier than the remainder of the zone and may be tempted to explore. I warn you now to stay out of the blasted lands period, This is the only other area I died. Due to a random Elite skull Outland Ogre that is chilling where it shouldn’t be. I had danced around him a dozen times, got complacent and got gotted by the guy. So, no need to be here. Just ride south and ignore the zone.
Side rant over. Let’s head to the route.
Route:
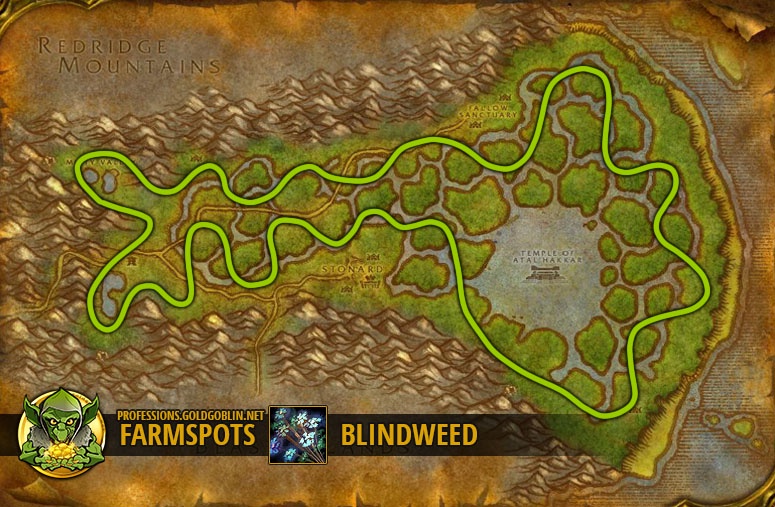
As you can see, I truly didn’t need to create my own route as Goldgoblin has guides for all classic Mats that you need to gather. Follow this loosely and everything will be good.
The herb that brings us here as you can also tell is the Blindweed. Interspersed throughout will be Sungrass, and whiskers with occasional goldthorn.
Places of note will be the South Eastern zone as a bunch of Elite Dragonkins and even some High level Elite Dragons patrol the area. Be mindful of your meld and Feign and play it safe until you can solo elites. There is also a cave in the southeast along the mountains. This cave is full of murloc, just outside are almost 8 nodes of Goldthorn so do with that as you will.
Nodes of Note here are as follows:
- Blindweed – Most important reason we are here and it is the only place you can find the stuff.
- Sungrass – Uncommon but is useful and exciting when you find it
- Goldthorn – Very important resource, but isn’t the primary reason we are here. You will not get a bunch, go to one of the other zones.
- Whiskers – Common and useful, but we should be approaching the end of their usefulness.
- Iron Ore – Always important for blacksmiths
- Mithril Ore – Uncommon but a good source of EXP.
- Seasoned Wood Roots – you will be taking advantage of the High EXP returns from chopping these roots at the bottom of most trees. Like almost 500 EXP per unrested node, this is also where you’ll farm until 225.
Zone 4: Alterac Valley Outer Ring Mountain
This section here is for Blacksmiths. The amount of Iron ore that can be mined here is absurd. Entering every cave and climbing the sides of the peaks will ensure a healthy haul. The recommended approach is Once around the Mountain, then once around Thousand Needles. Then you craft and repeat.
Route:
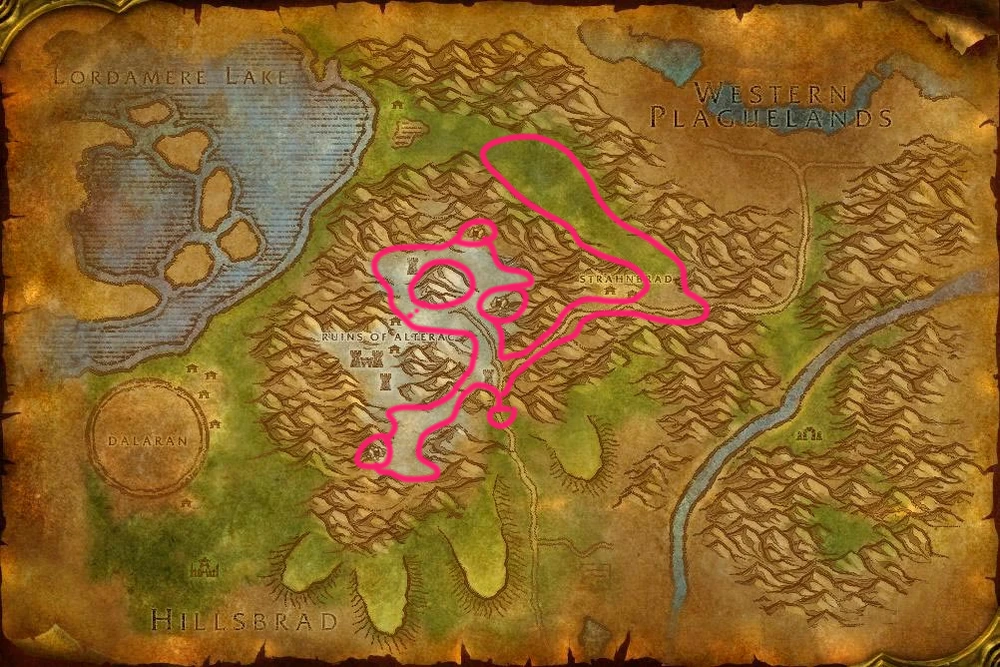
This route is fairly simple. Don’t enter the Elite zone till after 60, and be careful when you enter the caves. Other than that go ham here. There are plenty of resources to gather and most of it is iron ore. This is one of the end game farming routes alongside Thousand needles. With consistent hauls and not super threatening enemies outside the elites, you will have an easy time clearing the area.
Nodes in this zone are as follows:
- Iron Ore – the most important resource here, it is abundant and easy to find.
- Mithril Ore – Uncommon but a nice boost to the EXP gains here.
- Gold Ore – Rare, for some reason there are one or two nodes of the stuff and they don’t spawn elsewhere.
- Silver Ore – Not worth farming at this stage, you should be well past silver.
- Wintersbite – Maybe you will still be at the section of Herbalism where this is relevant for EXP. Otherwise no recipe we need uses it.
- Bruiseweed – I think that there are a couple nodes, but again by the time you farm here you should not need anymore of the stuff.
- Whiskers – Maybe you’ll still need the stuff for a few crafts, but it can always be worth the extra EXP to pick up.
Takeaway:
Again this is not an exact guide for levels 1 – 70. Instead this is designed as an overview of the resources necessary for the most beneficial crafts, Routing to maximize time spent not getting EXP, and finally a zone by zone breakdown so that you don’t head somewhere early that you cannot handle. As we transition to the end game we have 5 final zones to cover. Followed by an endgame route and tips that will maximize your time. By the time I hit 45 on my 2nd attempt when I died I cut my time down and made it there in 17 hours and some change, matching my time to 35 but adding an additional 10 hours. This was from research and increased efficiency through these areas. The 3rd and final attempt at this trial I made it to 45 in just under 16 hours. So there is in fact room for improvement even in the early game to maximize time. Without further ado, let’s talk endgame.
Early Endgame & Endgame Zones:
This portion will be broken down into level quadrants, 42 then 45, then 48+. Yes we will only spend 3 levels in one zone twice before moving on. Now the level 45 zones can be returned too if you find yourself hurting for EXP per hour. But we have a lot of that even without returning to the zones. So there is a possibility that you will not return.
Level 42 – Azshara
At 42 I felt safe enough to enter the zone and fight creatures 3 levels higher than me while avoiding the elites. I warn you now, do not fight them. They will destroy you, and they are easy enough to avoid.
Right out the gate we will be getting Woodcutting from 225 to 275 if we can, 250 is also fine as we need it for the next section of the guide. 250 is where we can start chopping the Elderwood in Un’Goro but not Winterspring. So, my recommendation is to get it here so you don’t have to go to Un’Goro.
As for Alchemy and Herbalism we are here to get only a few resources. As both should be 250 as you enter this section. Azshara is good for only one resource, Dreamfoil. Using this alongside the Golden Sansam, and Sungrass you will be crafting 3 Items. My recommendation however, just level to 275 using earlier recipes, then use another profession to level to 45 or 48. If you must then these will be the recipes you use.
Craft 1 – Greater Agility Elixir:
Now if you don’t wanna bounce back and forth between zones I would recommend using earlier crafts all the way to 275 and avoiding these zones entirely, but if you must than here is the first recipe to get you going.
Mats Req.
1 Sungrass
1 Goldthorn
1 Crystal Vial
Craft 2 – Superior Mana Potion:
This craft will have you returning to Swamp of Sorrow for the blind weed, or using what you managed to farm before leaving.
Mats Req.
2 Sungrass
2 Blindweed
1 Crystal Vial
Craft 3: Greater Detect Invisibility:
Now this recipe requires this zone and the next zone to be used effectively, and will only take you to 270 without needing a ton of extra crafts to climb the other 5 points if you’re unlucky. It also requires you to go to winterspring to buy from a vendor, but hey it would be a good time to set your hearthstone.
Mats Req.
2 Ghost Mushroom
2 Sungrass
1 Crystal Vial
Route:
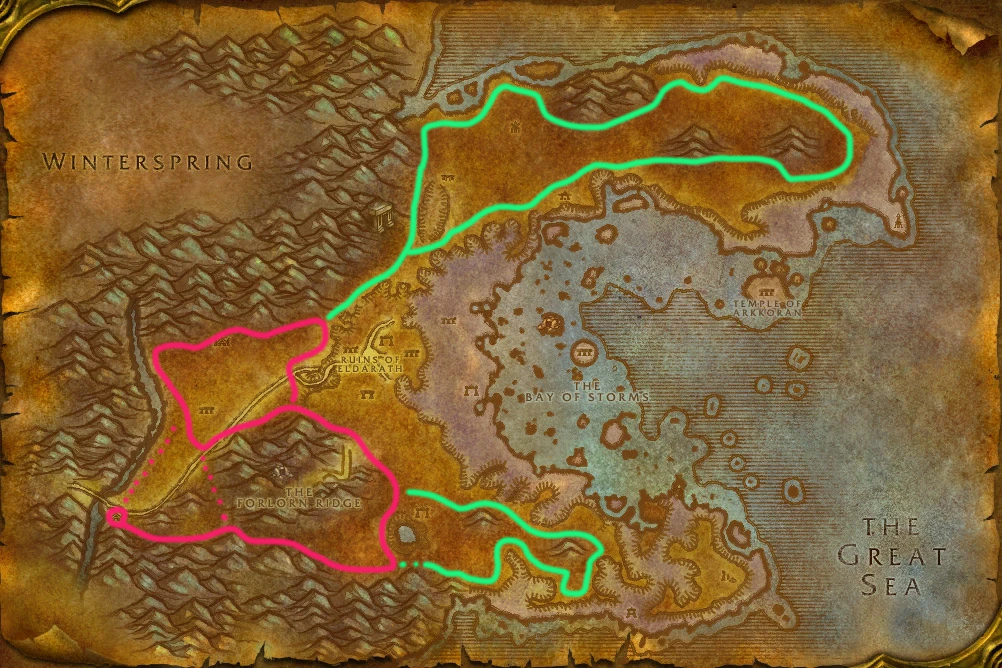
Now this zone is broken into two sections, one where you will definitely be able to survive at 42, and the other is a toss up if you aren’t careful. The red section doesn’t contain a whole lot of resources, but if you are brave enough tackle the green and reap the rewards. Just mind your P’s and Q’s and use your survival kit and you will be fine.
Nodes of note within this zone:
- Sungrass – Abundant and useful for some crafts we need.
- Dreamfoil – Common in the green sections and uncommon in the red, this is truly the reason we even visit this area because we will need a ton of it for the next section and all we can get now is wonderful.
- Mountain Silversage – Uncommon throughout both sections and is a wonderful boon if we see any, again for the next section.
- Mithril Ore – Rare and a nice EXP boost.
- Azshara choppable trees – These are what we need to get to 275 for the elder wood trees and these give respectable EXP till they are grey.
Level 42 – Hinterlands
This is primarily an Alliance territory, this is also a scary place if you are not careful. This includes the cave where the Ghost mushrooms are located. We need these bad boys for a craft to get to 275 and get some hefty boosts to EXP along the way. Otherwise the trees are all we come for, they get you close to 275 but I don’t think they can take you all the way. I won’t dwell long here.
Route:
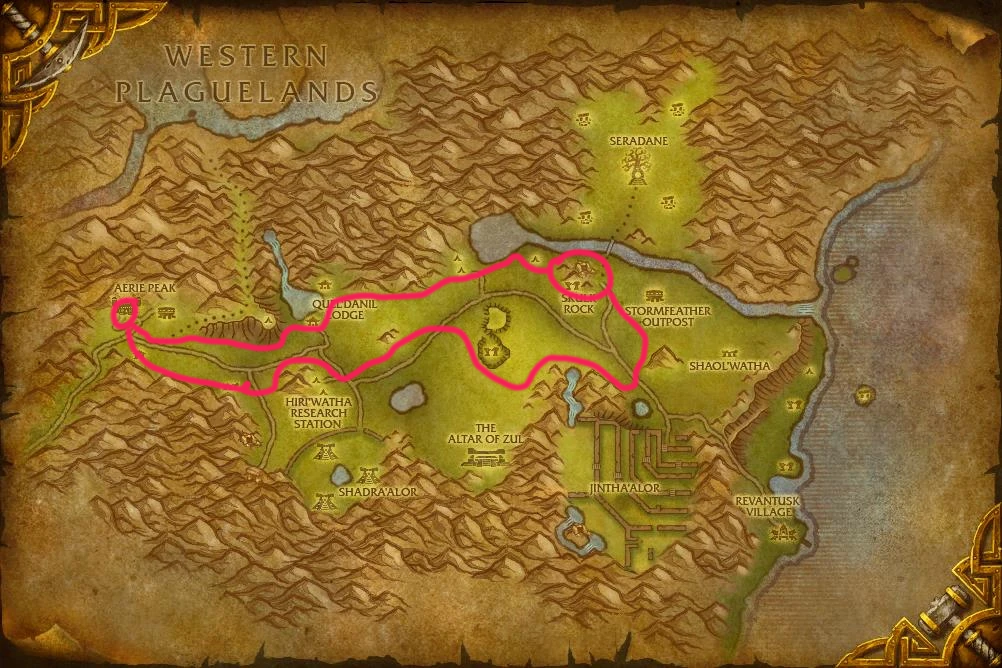
So, just avoid most things that want to kill ya, especially if they are elites. There are two sections where you can farm ghost mushrooms, but the second is behind a dense section of elites and mobs that the experience is not worth it.
Nodes of Note:
- Ghost Mushroom – Abundant at the circled location, non-existent anywhere else. Play safe and you can manage it.
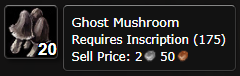
- Sungrass – Common worth grabbing while you’re here.
- Hinterlands Hardwood – May help you get to the requisite 275 for the next section.
Level 45 – Felwood
Welcome to the first true endgame zone. As a personal recommendation doing a rotation around the entire zone every farming session is a boost to the EXP with the inclusion of Gromsblood herb, Dreamfoil, and Plaguebloom nodes and of course the Mithril, Sungrass, Golden Sansam and Mountain Silversage spawns that are common for added EXP. There are no trees to chop here but this isn’t why we are here.
If you leveled to 45 and still have not gotten alchemy up to 275, this will be the zone that helps push you the rest of the way. At 250 we get access to Elixir of detect demons and at 255 we get mighty rage potion.
You may recognize this from the beginning of the guide, this will be a boost to endgame EXP and is a nice transitionary potion to level while in this zone. It gives a very good EXP unrested.
Mats Req.
2 Gromsblood
1 Crystal Vial
With the addition of Plaguebloom and Dreamfoil we can craft a few other recipes. The first being a drop recipe from Jadefire Rogue demons in Felwood. These next recipes will touch our endgame crafts.

I found this during research for this guide and gives an unknown amount of EXP. It may be worth killing the designated demons in Felwood if able and using it to get a boost in as it is yellow at 300. This does use our important Plaguebloom but may be worth it until we get to Winterspring at 48.
Using Gromsblood and Plaguebloom we have our endgame craft that grants a big portion of EXP per craft. And allows us to use up the Plaguebloom and Gromsblood we are harvesting once reaching 275.
The route for this zone is pretty complicated and will involve thought and understanding of your build to warrant entering a few of the harder areas.
Route:
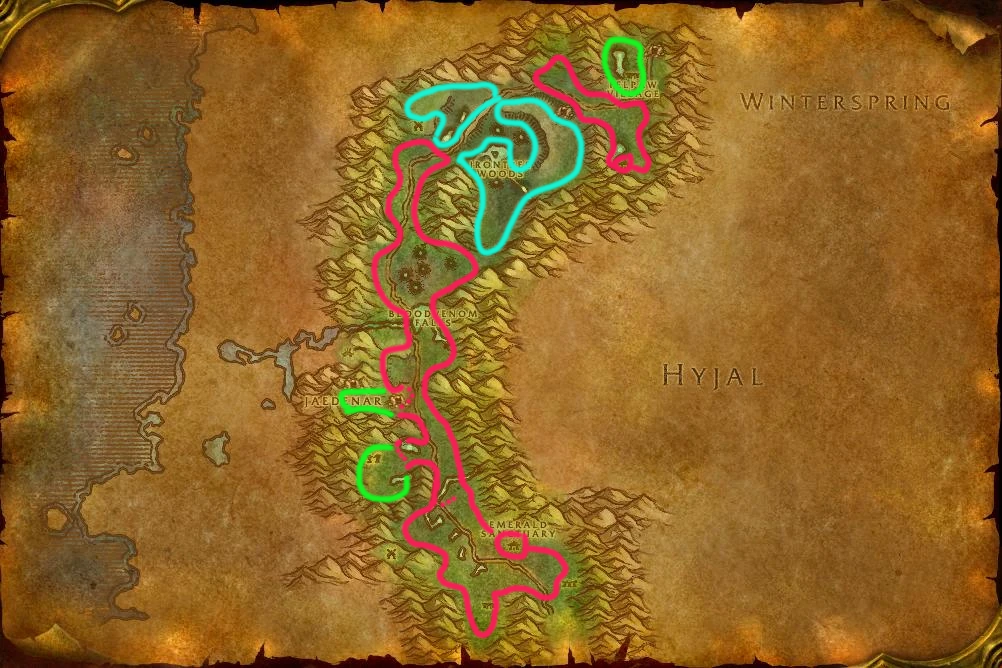
This route is broken into two sections. The first is the section I recommend tackling below 60. And the other is after 60 when you do not have to worry about the mobs any longer. Follow the red section while using your best judgment when entering areas with high mob density. For the green areas, I recommend being above 60 so that the threat of death is minimal for you, these areas have more than average dangerous mobs including some elites. The blue section can be tackled at your discretion just be mindful of overpulling trees in this area and demons on the ridges.
Nodes of interest are as follows:
- Gromsblood – Common and not abundant enough for my tastes but much better than attempting to navigate the badlands around the dark portal.
- Plaguebloom – Uncommon and very helpful to have even more of the stuff. On a good day you will always farm more Icecap than Plaguebloom and need more of it than anything else.
- Golden Sansam – Uncommon but it is a nice boon to have another location to farm this stuff for potions.
- Mountain Silversage – Rare and should always be picked up when you see it. This stuff is uncommon at best and rare at most.
- Dreamfoil – Uncommon to rare, this stuff is highly sought after and you are going to want as much as you can get your crafting hands onto.
- Sungrass – As if this stuff isn’t prolific enough, you can even find it here and everywhere you look. No longer need it in the endgame but EXP is EXP.
- Mithril Ore – It is in out of the way areas most of the time and almost not worth grabbing in this zone, consider it before chasing it.
Level 45 – Western Plaguelands
As before you will find nodes of Plaguebloom, Sungrass, Dreamfoil, Arthas’s Tears, Mithril, Gold, Iron, and more within a small tight area on the eastern side of the zone. Unless you are reckless and run into the middle of the plague fields before 60, then you will most likely survive the encounters of this zone.
Route:
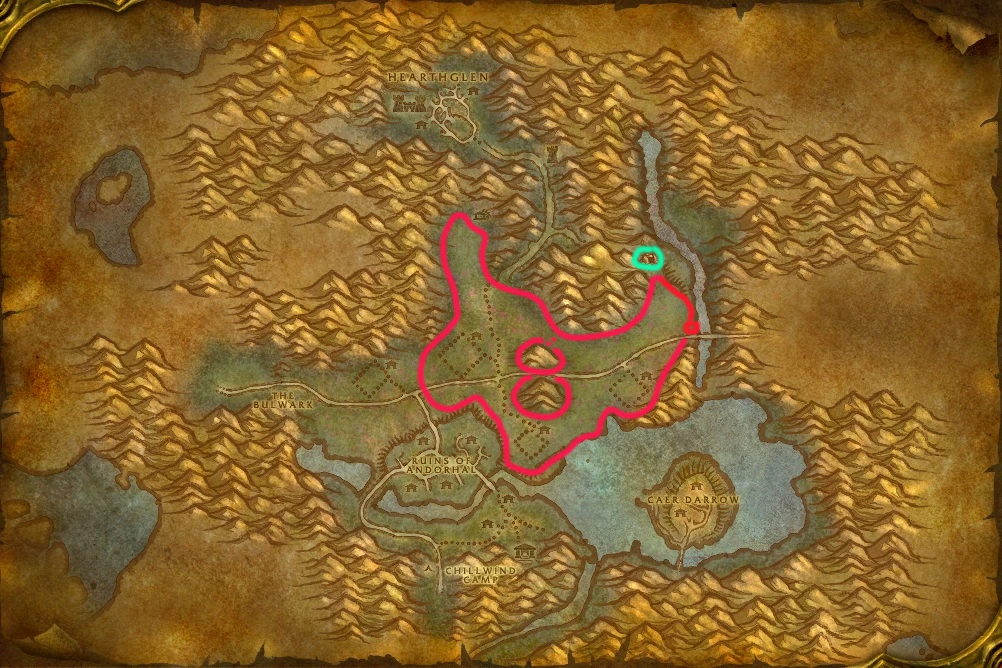
This zone is very straight forward. Some key takeaways can be additional potion recipes that will help you finish this trial and possibly future trials as well. Contained within overworld chests you can find the Greater Arcane Elixir recipe. And from the cave marked in green on the map you can kill the fungal behemoths in the back of the cave for a very rare drop in the Greater Nature Protection Potion. And trust me, even if you don’t want the recipe it sells quite nicely on the Auction House after the trial is over.
Otherwise keep out of the fields until 60 and you shouldn’t have any issues with this zone.
Nodes of import here are:
- Plaguebloom – Abundant. Whenever you see a node, go out of your way to grab it unless you can’t fight your way to it.
- Sungrass – Common. Can be ignored if you don’t want to go out of your way.
- Dreamfoil – Uncommon and always worth grabbing.
- Arthas’s tears – may be worth the little bit of extra EXP.
- Mithril – Hey it’s extra EXP.
- Gold – If you are a blacksmith then there are a few nodes along the way that are worth your time.
- Iron – Rare and almost never worth your time. Even if you are a blacksmith.
Level 48 and beyond
There are only two zones that will be added upon reaching this level. One is Eastern Plaguelands and the other is Winterspring. After this section I will discuss my preferred route and EXP per hour gains based on my own experience.
Eastern Plaguelands –
This zone is like any others listed before it, avoiding high mob dense areas until level 60. Always weave a bit away from the route to look for Plaguebloom as there are quite a few just outside the scope of the route included. We are truly only here for 2 resources before moving on, Plaguebloom and Dreamfoil.
Route:
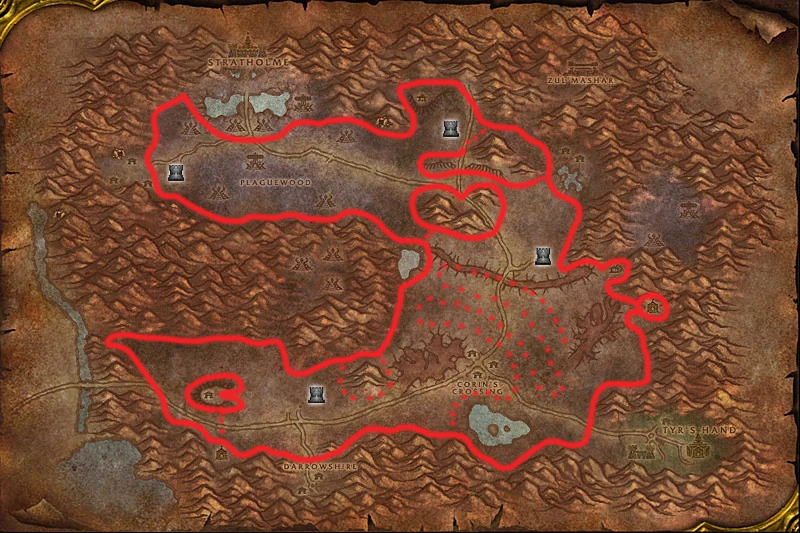
Stick around the edges similar to when you hunt for Ore and you will find most everything on the map. Around Corin’s Crossing you can zig zag through the open section of the zone as quite a few nodes spawn in that area. Avoid Tyr’s Hand even at 60 as there really isn’t anything worth it. No need to zig and zag though plaguewood as there isn’t much of anything there either.
Winterspring –
This zone will be the most important as it will be a huge source of gathering EXP as you explore for nodes. There are a few places to be mindful of as you explore. Feel free to grab quests in the area as you will be here for a while and if you are still looking to complete rep grinds then this is a perfect opportunity to knock it out. Our primary goal is Icecap and the secondary resources are Elder wood nodes and Mountain Silversage.
Route:
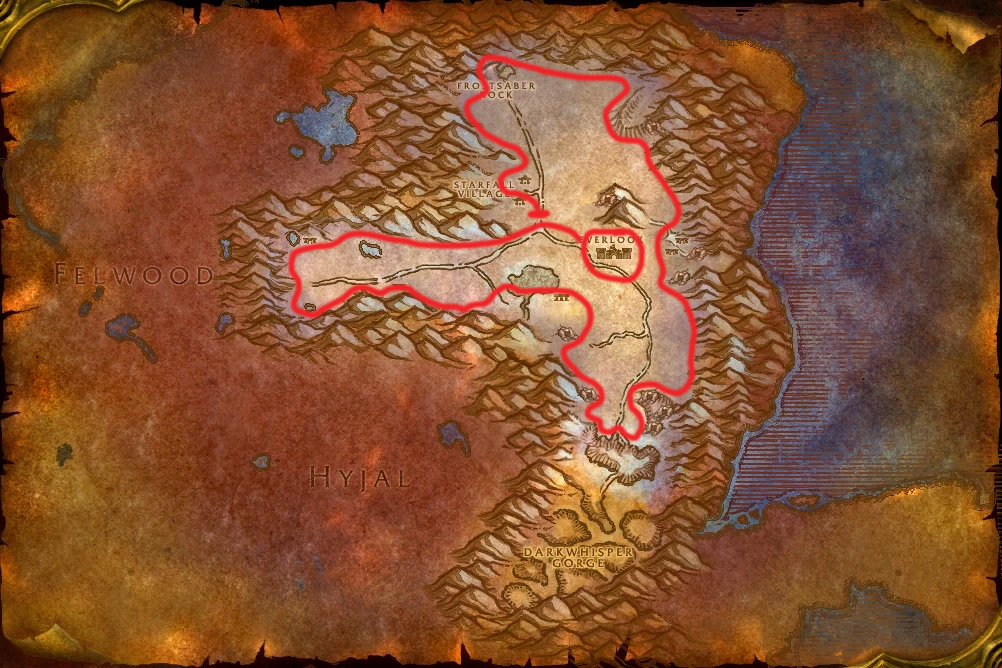
So the map may look a bit funky, but after completing this route you will understand quite a bit more. The original classic maps did not show where all the terrain obstacles were and I have done my best to depict that here. Some places of note to pay attention to will be the frozen lake, Dragonkin area, Elite Giants, and lastly Frostsaber rock.
Frozen lake can be tackled earlier than the other places as they are not elites, but you can get yourself into trouble if you don’t pay attention to what you drag. As for the dragonkin area. Fight one at a time until the recipe drops and then ignore the area as you see fit. Don’t do that until you are at least 55, maybe even 60.
The giant area should be ignored even past 60 as there aren’t a whole lot of resources in their area. And lastly, Frostsaber rock is included here for the few nodes that exist, none of which are Icecap. You can choose to end the route before then as you see fit.
End Game Rotation –
Starting at 48 you will have access to every zone that is in this guide. Now as for my rotation of farming and zones, it did my route as follows.
Winterspring, grabbing all Icecap, Silversage, and Elder logs as possible while completing the Furbolg rep and a few other minor quests.
I would end my run at Everlook and would fly to the northernmost point of the Felwood.
Felwood, I would work my way south in a zigzag pattern avoiding most trash and prioritizing Plaguebloom, Gromsblood, Dreamfoil, Sansam, and Mithril Ore. Anything else is a bonus. If you are looking to complete your Mythic scroll collection or want a powerful prestige build, grab the Grove Ranger Quests while in this area for the Grove of the Ancients. Worth completing in my opinion *wink wink*. After this route I would use my Stone to travel to Eastern Plagueland.
Eastern Plagueland, from here I would head west and south following the route while avoiding anything except herbs. Grab everything as it all grants EXP and there is usually nothing to contest you here. Kill what does and be on your way. Upon completing a full rotation fly to the easternmost flight path of Western Plaguelands.
Western Plagueland, from the eastern flight point head north towards the cave, this is where I recommend stopping to kill the hulks inside for a chance at Greater Nature Protection, other trials will find it useful, especially in dungeons *wink wink*. Then follow the route avoiding anything that you don’t have to kill. Go for every Plaguebloom, Dreamfoil, Gold and Iron ore along the route only. From here I would use my stone to go to Hillsbrad Foothills.
Once in Southshore, I would head north to the Mountain for a trip around the peaks to grab every Iron deposit I could find, usually ending my route in the valley close to the lake. From here it was a quick Stone to Ratchet or Un’Goro, and then a flight path to Thousand Needles. This is the reason I recommend the Stone for Thousand Needles.
From the Alliance flight point between Thousand Needles and Feralas I would travel along the South wall, head up into the Wyvern area and back out finishing the rotation after the second centaur camp along the way. In the first camp there is a cave with quite a few Iron nodes and when you are comfortable fighting your way in you can go grab those as well.
Finally I would Hearth back to Winterspring where I would do all of my crafting, if this was my 2nd time returning to Winterspring I would instead Stone to Stormwind and fly to the Redridge Saw mill as it was faster then running to the one in Elwynn Forest. Then after making planks I would Hearth to Winterspring. After the crafting session I would begin again.
This rotation would take me just over an hour to complete on a good day, and an hour and a half on a bad day. When all was said and done, and crafting was complete you are looking at roughly between 150k – 200k unrested EXP an hour with just Herb, Alchemy, Mining and Blacksmithing. This does not account for the amount of time needed to farm Copper in Thousand Needles or Elwynn Forest if you are an Engineer. Nor does this account for any additional Professions such as Enchanting, Skinning, or Leatherworking as I used none of them. Potential EXP gains could be greater with freshly spawned nodes that are uncontested, rested EXP, and of course additional Professions.
For those curious the EXP requirements past level 60 are as follows. 60 – 61 will take about 180k EXP and will increase an additional 100k – 120k per level until 70, where you will need a whopping ~1.1 Million EXP. All in all each level took me roughly 3 – 5 hours to complete as I started using rested EXP between sessions.
I finished my final attempt in 2 Day 12 Hours and some misc. amount of minutes. There are faster times, probably those abusing some secret I am unaware of at the time of writing. At the beginning I cover the crafts that you will use at the end for grinding EXP along with noting in the guide where good stopping points would be for potentially better EXP gains. I chose not to stop at Alchemy 225 to determine EXP gains per hour. With less need for traveling between zones this may end up being the preferred route that many use for speed and efficiency.
Final Final Notes
So this section is freeball at the end of my writing of this guide. For any and all curious I am in no way affiliated with, or am sponsored by the owners/creators of Ascension wow. If you don’t like purchasing things in games like this then don’t you will have to work in bag purchases into your route or take tailoring to assist you in your endeavors.
Please, please, please do not take this guide as gospel. This is nothing more than an overview of the path one could take to max level for this trial. In no way are any of the numbers listed in this guide for EXP hard facts. I do not have pictures or videos and this guide was put together almost a month after completing the trial myself.
Please use your brain to deviate from this guide to better suit you, your playstyle, and your time constraints. Do not be afraid to log out in an inn for a week to play other characters, then log in for a couple of hours to use that boosted EXP.
Please research things on your own. I Tried to fact check as much of the information as possible in this guide, but I am not infallible nor am I perfect. so go forth with that as you will.
Now should you have questions in game, or are just curious to chat with me. Truemoon on Area-52 is my Trial toon and the toon I log into more often than not. Just to give you a timeframe if you come to this guide quickly. I am writing this the week after the release of Path of Exile 2’s early access in Early December. If you don’t see me on then you can find me on Discord @ Loremaster Teach
Adapted from a guide by TrueTeach published on db.ascension.gg.









0 Commentaires
Aucun commentaire pour le moment. Soyez le premier à commenter !