
Build Video
Build Overview
This Monk build  notable Impending Doom Chayula relies on a simple idea: turn the Acolyte of Chayula’s recovery engine into a damage-dealing machine. The ascendancy has a passive, Waking Dream, that grants
  Into the Breach and spawns a remnant every 1.2 seconds. Each remnant picked up grants a bonus tied to its color, and remnants like arcane and vigorous remnants restore a massive amount of mana and life. In practice, simply moving around the map is enough to continuously regenerate both resources.
This is where  Explosive Transmutation comes in: every remnant picked up detonates and deals damage to nearby enemies. Picking up remnants is no longer just about sustain — it also fuels clear speed. The survival engine becomes the clearing tool, and simply moving forward is enough to melt packs. Explosive Transmutation as well as
  Elemental Weakness carry several tags — fire, cold, and lightning — which makes them particularly receptive to sources of extra gem levels.
The offensive core, meanwhile, lies in a loop interaction.  Doedres Undoing converts your curses into
  Cursed Ground and caps the number of active cursed grounds at two. notable Impending Doom, for its part, deals chaos damage whenever a curse is removed from an enemy. By linking Elemental Weakness to
  Spell Cascade, each cast creates three cursed grounds instead of one: the third immediately expires the oldest one, which triggers notable Impending Doom on every cast.
  Original Sin ties the equation together by converting all elemental damage into chaos damage, so the build only has a single damage type left to optimize.
Strengths / Weaknesses
✅ Strengths
- Permanent sustain: arcane and vigorous remnants continuously restore life and mana, just by moving
- Very smooth mapping: every remnant picked up explodes, clearing happens almost passively while moving
- Simple gameplay: few buttons to manage, low mental load during long sessions
- Double scaling: each additional level of Elemental Weakness strengthens both Doedres Undoing and the explosion of notable Impending Doom
- Single damage type: Original Sin converts all elemental damage into chaos, making optimization much clearer
- Reasonable entry budget: the build works without a massive investment, while keeping plenty of room to progress
❌ Weaknesses
- Dependent on gem levels: without
 Sunsplinter or
  The Vertex, Elemental Weakness caps far below the targeted level 40 and damage drops accordingly
 - Original Sin comes late: full conversion to chaos is an endgame goal, not a starting point
- Movement-based build: damage comes from picking up remnants, so you have to stay mobile at all times
- The author doesn’t mention any major weakness in his video, presenting the build as comfortable and easy to play
Skill Gem Setup by Step
This build offers 3 progression steps from leveling to the final build. Select a step to see the corresponding gem setup.
Endgame
8 skills • 28 gemmesAu cœur de la BrècheInto the Breach


 Projection de sortilègesSpellslinger
 ParadeParry
 Sceau de pouvoirSigil of Power



 Explosive TransmutationExplosive Transmutation

 Sensibilité aux élémentsElemental Weakness

 Remnants of KalguurRemnants of Kalguur

 Reliquats de ManaMana Remnants
Rarity
9 skills • 30 gemmesAu cœur de la BrècheInto the Breach
Projection de sortilègesSpellslinger
ParadeParry
Sceau de pouvoirSigil of Power
Explosive TransmutationExplosive Transmutation
Remnants of KalguurRemnants of Kalguur
 Présence flétrissanteWithering Presence
Sensibilité aux élémentsElemental Weakness
Reliquats de ManaMana Remnants
Présence flétrissanteWithering Presence
Sensibilité aux élémentsElemental Weakness
Reliquats de ManaMana Remnants
Delirium 200%
10 skills • 34 gemmesAu cœur de la BrècheInto the Breach
 Projection de sortilègesSpellslinger
ParadeParry
Sceau de pouvoirSigil of Power
Explosive TransmutationExplosive Transmutation
Projection de sortilègesSpellslinger
ParadeParry
Sceau de pouvoirSigil of Power
Explosive TransmutationExplosive Transmutation
 Danse fantomatiqueGhost Dance
Remnants of KalguurRemnants of Kalguur
Présence flétrissanteWithering Presence
Danse fantomatiqueGhost Dance
Remnants of KalguurRemnants of Kalguur
Présence flétrissanteWithering Presence
 Reliquats de ManaMana Remnants
Sensibilité aux élémentsElemental Weakness
Reliquats de ManaMana Remnants
Sensibilité aux élémentsElemental Weakness
Recommended Equipment
The build’s gear revolves around a single goal: stacking as many gem levels as possible on Elemental Weakness. Here is the planner configuration in the Endgame version.
- Helmet — The Vertex: the reworked version grants +5 to all curse gem levels. This is the strongest item in the build.
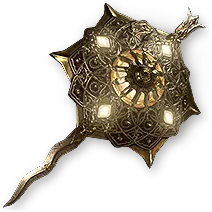
- Off-hand — Sunsplinter: this buckler distributes a large number of extra gem levels across the fire, cold and lightning tags, exactly the ones carried by Elemental Weakness and Explosive Transmutation.
- Main hand — rare wand (Dueling Wand): two socketable slots, used here for stat-support runes.
- Ring — Original Sin: converts all elemental damage into chaos damage. This is what unifies the build’s scaling.
- Gloves — Maligaros Virtuosity: offensive bonuses on critical hits, complemented by a rune in its slot.
- Belt — Darkness Enthroned on the Endgame version, replaced by Headhunter in the 200% Delirium variant.
- Body Armour, Boots, Amulet and second Ring: rare rune-forged pieces, chosen for resistances, life and mana. Nothing mandatory here — this is the build’s flexibility zone.
- Jewels:
 Heart of the Well at all times, paired with a sapphire jewel in Endgame or a
  Megalomaniac in the 200% Delirium variant.
 - Flasks and Charms: classic Endgame configuration, which upgrades to
 Olroths Resolve,
  Laviangas Spirits,
  Nascent Hope and
  Beiras Anguish in the most optimized variant.
Gameplay Tips
- Never stand still: remnants spawn continuously, and picking them up triggers both recovery and the explosions of Explosive Transmutation.
- Keep Elemental Weakness on the pack, not on a single isolated target: with Spell Cascade, every cast lays down three cursed grounds and detonates notable Impending Doom across the whole area.
- Let Spellslinger do the work: the automatic trigger means you don’t have to manually chain-cast while on the move.
- Sigil of Power and Parry round out the defensive kit: the first strengthens the area you’re fighting in, the second leverages the buckler equipped in the off-hand.
- Prioritize gem levels over raw damage: all else being equal, a source of extra levels on Elemental Weakness gives more value than a percentage damage roll.
Acolyte of Chayula: the remnant engine
Everything starts with the remnant mechanic unique to the Acolyte of Chayula. The Waking Dream passive grants Into the Breach, which spawns a remnant every 1.2 seconds. Picking up a remnant grants a benefit depending on its color, and it’s the arcane and vigorous remnants that do all the work: the former restore a large amount of mana, the latter a large amount of life.
The result is a recovery engine that requires no active management. Where other builds have to trade off between survival and damage, this one recovers both resources simply by moving forward. This foundation is what then allows for aggressive offensive choices, without having to leave room for classic sustain.
Explosive Transmutation: when sustain becomes damage
Explosive Transmutation is the piece that tips the whole build over. Every time a remnant is collected, it detonates and damages nearby enemies. Picking them up is therefore no longer just a defensive gesture: it becomes the main source of clear. Since remnants spawn continuously, clear speed largely takes care of itself while moving.
What the video highlights is that Explosive Transmutation‘s damage scales very strongly with gem level. This is therefore not a skill you scale with classic percentage damage, but with sources of extra levels — a common thread running through the build’s entire gear.
Elemental Weakness and Impending Doom: the Monk Impending Doom Chayula build loop
The star of the build remains Elemental Weakness, thanks to its synergy with Doedres Undoing and notable Impending Doom. Doedres Undoing turns your curses into Cursed Ground and caps the number of active cursed grounds at two at a time. notable Impending Doom, in turn, deals chaos damage every time a curse is removed from an enemy.
The trick is to link Elemental Weakness to Spell Cascade: each cast creates three cursed grounds instead of one. Since only two can coexist, creating the third one immediately removes the oldest — and that removal triggers notable Impending Doom. In other words, the loop goes off on every cast, with no condition or cooldown to keep track of.
Second point, just as important: Doedres Undoing and the explosion of notable Impending Doom both scale with the level of Elemental Weakness. Every gem level gained therefore improves both halves of the damage at once, which explains the build’s obsession with level stacking.
Sunsplinter and The Vertex: pushing Elemental Weakness to level 40
Elemental Weakness carries several tags, including fire, cold, and lightning. This trait makes it eligible for a large number of additional gem levels granted by Sunsplinter, the buckler equipped in the left hand. This is exactly what the build is looking for, since the same bonus also benefits Explosive Transmutation.
Added to this is The Vertex in its reworked version, which grants +5 to the level of all curse gems. By stacking these sources, it becomes possible to push Elemental Weakness up to level 40, which massively increases the damage of notable Impending Doom and the effect of Doedres Undoing. These two items form the true backbone of the progression.
Original Sin: converting everything to chaos
Original Sin is the item that ties everything together. By converting all elemental damage into chaos damage, it turns every explosion from Explosive Transmutation into pure chaos damage. There is therefore no longer any need to scale several damage types in parallel.
This simplification has a concrete effect on the passive tree and on the affixes being sought: there is only one direction to aim for, which makes the build noticeably easier to optimize and much clearer for a player discovering the archetype. This is also what allows the build to stay effective even with incomplete gear, and then to scale very high once the key uniques are gathered.
Skill Tree
📖 Retrouvez tous les builds et guides Path of Exile 2 : Voir tous les builds PoE2 →









0 Commentaires
Aucun commentaire pour le moment. Soyez le premier à commenter !